Category

Yoga Practice

​Why Prioritizing Stress Management NOW is Important

By Yoga, Yoga PracticeNo Comments


As we enter a new era where adaptation and often sheer survival instincts are essential, how can we possibly make time for stress management? In an ideal world, we would have all tested and practiced various stress management techniques to find out what worked for us before self-isolation and social distancing was recommended or required, but that simply wasn’t the case for most of us. We’re now dealing with more stressors than ever before, from learning how to co-work in a little studio with our partner or figuring out the best home-based learning solutions for our children. 

Stress management isn’t a luxury. It’s part of our inherent and very necessary survival skill sets as human beings. We have no choice but to adapt in many situations, including the one we’re in right now. There are countless avenues to alleviating stress and anxiety, and not all of them are healthy. If we don’t take a conscious effort to explore and identify healthy relief that works for us, we’re likely to reach for vices that provide temporary but dangerous and harmful results. Smoking, drinking, or spending hours bingeing on Netflix are all very common “stress relievers” that don’t do us any favors in the long run—or even in the short run.


Start Simple: Short, Easy and Accessible


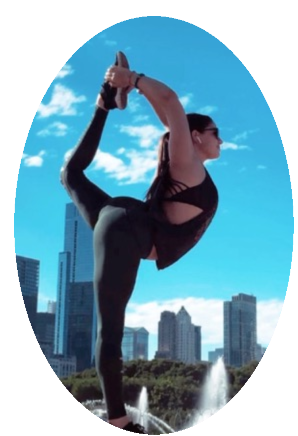
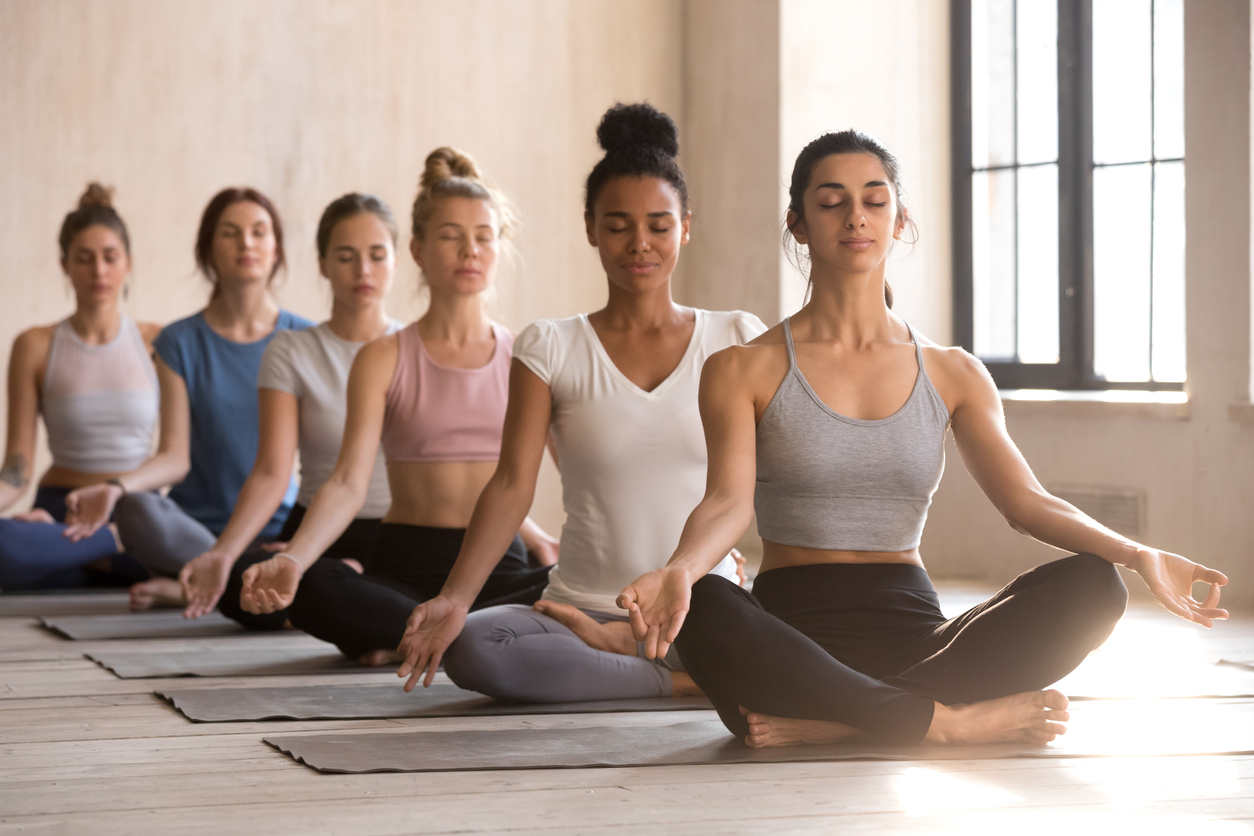
You’ve probably heard that yoga and meditation are fantastic avenues to relieve stress and anxiety, and they are! However, many of us—particularly in western countries—have been conditioned to think there’s a “right way” or “best way” to practice both. For instance, maybe you’ve heard that a proper yoga session should be 90 minutes, and you can certainly find studies to back up just about any claim. Rest assured, 90 isn’t a magic number. The reality is that any time you can spend on the mat is beneficial.


I personally have a daily 30-minute yoga practice. Admittedly, this began before the COVID-19 issues, and I started practicing at home in November. It worked for me then, and it works for me now, because as a small business owner I simply don’t have the time to get ready to go to a studio, commuting 20 – 30 minutes each way. It would honestly be more stressful to watch the clock all day to see what else I have to squeeze in before I had to go.


I “graduated” from using free YouTube yoga classes to simply writing down key asanas I wanted to practice every day and creating my own new daily flow. Granted, I had the benefit of 600 hours of yoga teacher training to help me with this, but that isn’t a requirement either. If you’ve practiced yoga before, you can start experimenting with creating your own flows. There are countless flows online you can use and tweak.


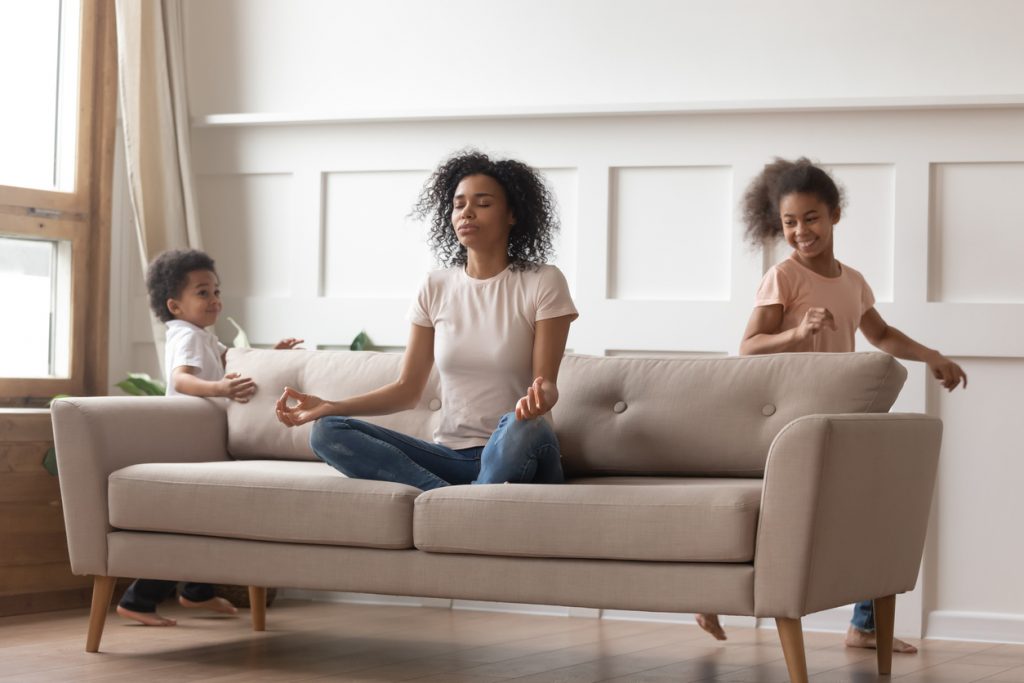
Plus, know that 30 minutes also isn’t the magic number for everyone. It’s simply what works for me and my schedule. You can amplify that time by selecting background ambiance if that helps you deepen your practice. Ever the multi-tasker, I have taken to listening to 30 minutes of classical music as my yoga practice background. Classical music isn’t something I was able to indulge in on a daily basis before a home practice, so there’s the added benefit of imbuing that joy into my daily life, which you can add to your practice as well. I also burn incense in my little office-cum-studio and face my mat towards the window that overlooks my front yard. Any little thing you can do to enhance whatever length practice you have at home is beneficial. The important thing is to make this your time to get on the mat. And if you have kids with no other adult in the house to watch them during this time? It might be time to start exploring yoga videos to practice with children.


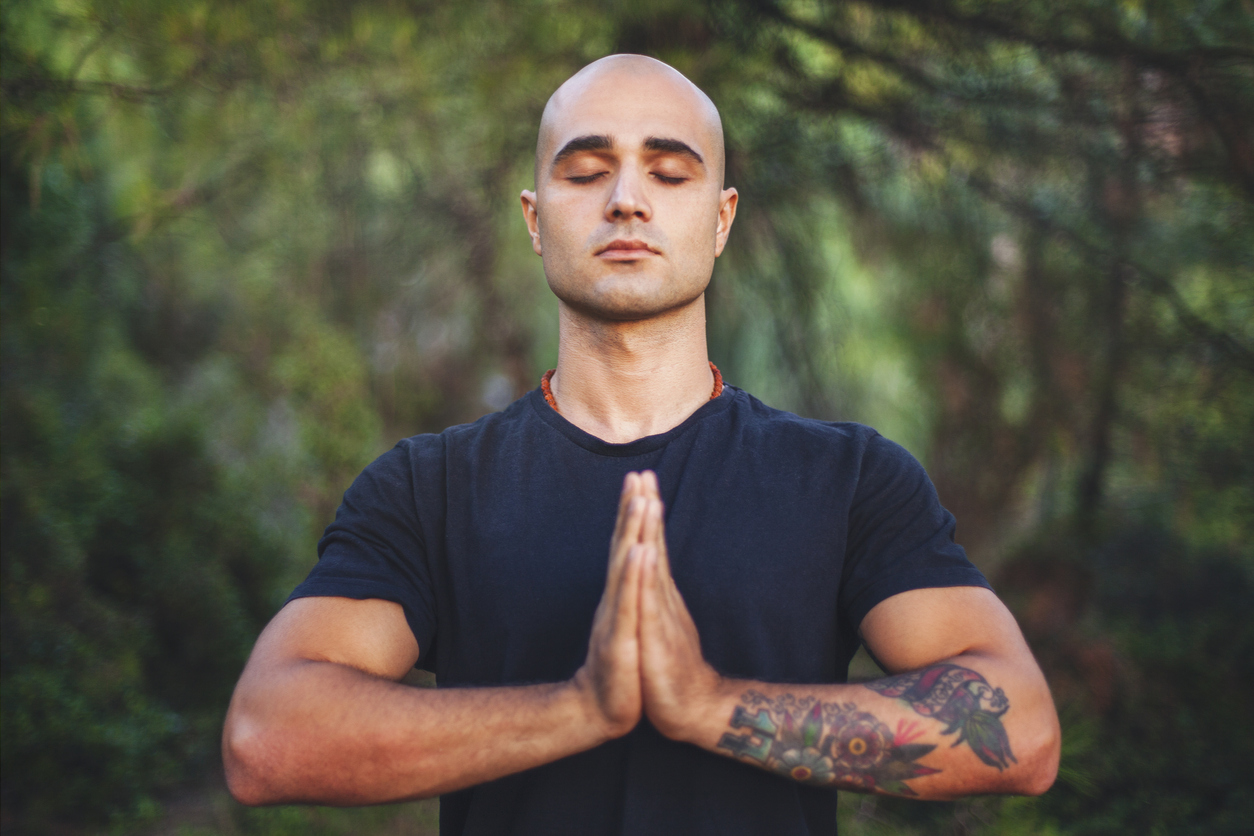
Making Time for Meditation


One of the pillars of meditation is concentrating on living in the present. It’s extremely difficult to do, so simply trying not to get flustered is a big part of the practice. My personal meditation practice usually follows my yoga practice or takes place first thing in the morning. I’ve tried out several types of meditation in my life, and I’ve found that candle meditation (staring at the base or tip of a flame in the dark) and mala beads work best for me.


It’s been said that you can practice meditation anywhere, and to an extent, that’s true. However, it can be difficult to really live in the present and focus solely on your breath if you’re trying to multi-task and meditate while you wash dishes. I adopted a ten-minute meditation because—at this point in my life—that’s what my body and mind can handle. Yours may be longer or shorter, in the dark like me (honestly, it’s my closet) or in the daylight.

Be kind to yourself. Be realistic. And remember that what your yoga teacher said was true—the toughest part usually is just getting to the mat (even when it’s in your living room).


Jessica Mehta is an E-RYT500® and RCYT® certified yoga instructor. She received her initial 200-hour training at Peak Beings Yoga while she was living in Costa Rica followed by her 300-hour training at The Bhakti shop in Portland, Oregon and her children’s yoga teacher training at The Lotus Seed also in Portland. Jessica is the founder of Get it Ohm!, a karmic, mobile yoga series that offer complimentary classes to individuals and groups who don’t have access to traditional yoga studios and/or don’t feel comfortable in such environments. As a citizen of the Cherokee Nation, Jessica created Get it Ohm! to prioritize indigenous students but anyone can request classes. Jessica is also a NASM-certified personal trainer (CPT) and has a background in amateur boxing,running marathons, and strength training. Personally, she has a daily yoga and meditation practice, and is a multi-award-winning poet. She also holds an M Philin Literature, an MSc in Writing, and is currently pursuing her PhD in literature at the University of Exeter in England. With plans to move permanently to India in the near future, Jessica looks forward to exploring different styles of yoga in South Asia and hopes to complete her prenatal yoga teacher training in Bali. Jessica is also a regular content contributor for YogaRenew. Learn more at Jessica’s author site at www.jessicamehta.com.


​A Yoga Flow for Balance and Soothing

By Yoga Poses, Yoga PracticeNo Comments


There are countless yoga videos available to download or stream, and unsurprisingly many of them are focused on stress relief. These challenging, unprecedented times have yogis scrambling for a “quick fix” or a way to infuse their practice with more stress-busting approaches. However, there’s no getting around the fact that screen time alone can sometime increase anxiety and stress. Since so many of us are working from home and staring at screens more than ever before, it’s worthwhile to dedicate at least one yoga flow a week to zero screens.

If you’ve been practicing for a while, have been thinking about pursuing your yoga teacher training certification, or are even in the middle of training, it’s especially important to learn how to create and adapt various flows of your own. For those who haven’t taught before, here’s a secret: there are a lot of yoga teachers out there (very good ones, too!) that don’t memorize and map out every single asana before every class. Intuition is a big part of being a good teacher—even when you’re your only student.

My home practice evolves around a daily flow that I create the day before. These are asanas that I especially want to focus on the next day, but they are by no means written in stone. It’s also a way to ensure that I don’t overlook some particular asanas for too long of a stretch. Left to our own devices, it’s very common to seek out the path of least resistance. Most of us like poses that we’re good at (as if there is such a thing) or that feel the best. We might not seek out the poses we find more challenging or uncomfortable if we don’t write down key asanas in advance. (Bear in mind, there’s a big difference between pain and discomfort.)

Creating Your Unique Flow


There is no perfect flow for balance and soothing. However, incorporating some restorative asanas into your usual flow and carving out time strictly for meditation post-savasana is a good start. Restorative yoga is often known for having ample props, but there’s no need to head straight to your favorite online yoga retailer to stock up. Props like bolsters and straps can easily be created through makeshift items in your home.

When soothing balance is the kind of flow you want to focus on, slow down. If you’re used to the uber-popular Vinyasa-style in the west, it might be time to incorporate more Iyengar-style yoga into your practice and hold poses longer.

Here’s a sample flow that I’ve practiced myself. When lockdown came into place, I transitioned to holding poses for one minute each (which means this flow will probably look a lot shorter than you imagine):

Child: Transition from resting forearms to hands extended with fingers spread wide. Roll the forehead along the mat as you finger-walk from the left to the right, holding each side for one minute.

Table Top To Cat/Cow Flow: One minute of “spinal play.” Feel free to explore barrel rolls, move side to side, or anything else that feels good.

• Thread The Needle: Option to keep free arm on the mat for support or in a half-bind behind the back.

Downward Facing Dog: Try to pedal your heels towards the ground slowly to stretch your hamstrings.

Extended Leg To Big Toe: We already don’t extend the toes in our regular lives. I incorporate this pose into every practice every day.

Downward Facing Dog: If you’ve taken up running as a means to get outside (while still keeping your six-feet distance), experiment with extending one sole flat to the mat with the opposite knee bent as much as necessary for one minute, then switch. Tight muscles in the legs are notorious for runners and yoga can help counteract that.

Forward Fold To Mountain: Any modifications in this transition are welcome, such as ragdoll.

Warrior 1 to Warrior 2: Option of elevating arms or not (depending on energy levels). The first couplet in the warrior series has become synonymous with yoga for many westerners, and incorporating it into your practice can be a welcome familiarity for those new to a home practice.

Tree: Modifications are welcome, including slow blinks or prayer hands behind the back.

Chaturanga Dandasana: Similar to the warrior series, this vinyasa flow can help provide comfort if you’re missing your usual studio practice. Take it slower for now, and practice one long breath per movement. Opt for full belly resting on the floor instead of hovering in a tricep pushup. Cobra breaths (rise with an inhale, lower with an exhale) can take the place of up-dog to downward facing dog.

• Legs Up The Wall: Do this pose for a minimum of two minutes.
 
Follow with ten minutes of meditation. Feel free to modify, tweak, or expand as you like. Remember to listen to your body during the flow as well. Even if you’re the one who writes the flow, that doesn’t mean you have to follow it to the letter—or at all.


Jessica Mehta is an E-RYT500® and RCYT® certified yoga instructor. She received her initial 200-hour training at Peak Beings Yoga while she was living in Costa Rica followed by her 300-hour training at The Bhakti shop in Portland, Oregon and her children’s yoga teacher training at The Lotus Seed also in Portland. Jessica is the founder of Get it Ohm!, a karmic, mobile yoga series that offer complimentary classes to individuals and groups who don’t have access to traditional yoga studios and/or don’t feel comfortable in such environments. As a citizen of the Cherokee Nation, Jessica created Get it Ohm! to prioritize indigenous students but anyone can request classes. Jessica is also a NASM-certified personal trainer (CPT) and has a background in amateur boxing,running marathons, and strength training. Personally, she has a daily yoga and meditation practice, and is a multi-award-winning poet. She also holds an M Philin Literature, an MSc in Writing, and is currently pursuing her PhD in literature at the University of Exeter in England. With plans to move permanently to India in the near future, Jessica looks forward to exploring different styles of yoga in South Asia and hopes to complete her prenatal yoga teacher training in Bali. Jessica is also a regular content contributor for YogaRenew. Learn more at Jessica’s author site at www.jessicamehta.com.


​A Home Yoga Practice for Respiratory Wellness

By Pranayama, Yoga, Yoga PracticeNo Comments


A holistic health practitioner once told me: “The body is designed to heal.” I found her words very comforting. In yogic terms, the body’s dharma, or purpose, is to repair itself so it can remain a healthy vehicle for the soul. We may feel particularly vulnerable right now due to widespread illness, but we can support the body’s healing abilities with yoga. In response to the coronavirus pandemic, here is a home practice that promotes respiratory wellness by exercising the lungs, opening the chest, and improving posture.


1. Three Part Breath and Alternate Nostril Breathing

With repeated practice Three Part Breath (Dīrgha Prāṇāyāma) teaches us to use our full lung capacity. Sit in Easy Pose (Sukhāsana) with your hips elevated on a block or blanket. Place one hand on your abdomen and one on your heart to feel the rhythm of your breath. Inhale deeply from your belly, send the breath up through your rib cage, and then into your chest until your lungs are full. Exhale from your chest, deflate your ribs, and draw your navel back towards your spine to completely empty your lungs.
Alternate Nostril Breathing (Nāḍī Śodhana Prāṇāyāma) purifies the nāḍīs, which are channels for energy flow in the body, and it’s very calming. Place the pointer and middle fingers of your dominant hand on the bridge of your nose or curled into your palm. Inhale fully through both nostrils. If you’re right handed, press your right nostril closed with your thumb and exhale through your left nostril. With your right nostril blocked, inhale fully through your left. Close your left nostril with your ring finger. Then release your thumb and exhale out your right nostril. With your left nostril blocked, inhale fully through your right. Close your right nostril and then exhale out your left. If breathing through the nose is difficult due to sinus congestion, practice Three Part Breath through the mouth and avoid Alternate Nostril Breathing until the airways clear. Take long, full breaths for the remainder of the practice.
 

2. Bound Angle Pose

Bound Angle Pose (Baddha Koṇāsana) opens the abdomen for deep breathing. Sit upright and bring the soles of your feet together in front of you with your knees wide. Place a prop under each knee for support. Inhale from below your navel and fill your lungs completely. Take several rounds of deep breaths in this posture.

3. Locust Pose


Locust Pose (Śalabhāsana) improves our posture which promotes lung efficiency. Lay face down and interlace your hands behind your back, drawing them towards your feet. Bring your feet together, and on an inhale, lift your feet and chest off the mat. Press your hips down as you stretch from your waist, opening your chest from below your shoulder blades, rather than bending at your lumbar spine. Incorporate this pose into a few rounds of Classical Sun Salutations (Classical Sūrya Namaskar). Practice it in place of Cobra Pose (Bhujaṅgāsana). Classical Sun Salutations prepare the body for other āsanas by loosening the shoulders and hips.
 

4. Cow Face Pose

Cow Face Pose (Gomukhāsana) opens the chest and shoulders. Start on your hands and knees. Cross your left shin over your right calf behind you. Sit upright so your right knee stacks on top of your left and your feet land by your sides. Alternatively, practice the upper body portion of this pose in a comfortable seated position. Reach your right arm out to the side and bring your right hand to your low back, palm facing out. Extend your left hand to the ceiling, bend the elbow and reach your left hand down your back. Gently move your hands towards each other along your spine until your fingers clasp. If your hands don’t meet, don’t force it. Hold the ends of a towel or piece of clothing to bridge the gap between your hands. Repeat on the opposite side.
 

5. Bridge Pose

Bridge Pose (Setu Bandhāsana) opens the chest while strengthening the lower back and legs. In a reclined position, lift your hips off the mat, position your feet under your knees, and relax your arms by your sides. For support, position a block under your sacrum (triangular bone at the base of your spine). Send nourishing prāṇa into the heart-space with Three Part Breath.
 

6. Corpse Pose

Conclude in Corpse Pose (Śavāsana) or in another restful posture like supported Reclining Bound Angle Pose (Supta Baddha Koṇāsana). Cease breath control and relax the body. Withdraw your senses from the external world and focus on the natural rhythm of your inhales and exhales. Meditate on an affirmation like The body is designed to heal or My body is the home of my spirit. Your own inner wisdom may surface during this relaxation period.


Claire Papell is a writer and yoga teacher (RYT-500) committed to revealing and honoring the hard truths of being human. Her yoga education included extensive study of the rich tradition of bhakti-yoga – the yoga of devotional service. Through the reading of sacred texts, yogic philosophy and kirtan, she developed a deep and persistent wonderment about Spirit.

Claire believes the yoga tradition offers powerful tools for healing. She draws from personal experiences and her spiritual contemplations to present unique perspectives on grief, loss, and trauma. Through vivid language and a poetic voice, she hopes to connect closely to her readers. When leading a yoga class, Claire relates to her students with similar intention. Her personal yoga practice and teaching style emphasize thoughtful sequencing, steady pacing and unwavering emphasis on the breath. She designs each class to reveal what she values most about yoga, which is its remarkable ability to stretch our hearts – wonder-drenched and mystical places – so pain and joy, gratitude and grief can all exist, side by side.


​Relaxation in One Yoga Pose: A Step-by-Step Guide

By Meditation, Yoga, Yoga PracticeNo Comments


A few summers ago, I suffered from terrible anxiety. To cope, I’d often sit outside under the trees noticing the light pouring through the branches and listening to the sound of my breath mingling with the tune of fluttering leaves. It would bring me tranquility and it was time just for me. I had faith in this practice to restore me, if I gave the trees my full attention. Yoga requires a similar faith. If we practice with sincere effort, equanimity and trust, over time the process of yoga will bring us back to ourselves. And like the shelter of the trees, one pose can also be a place of refuge. The āsanas are not simply things we do. They are places we go.

The current global health crisis is a moment of emotional, physical, and spiritual depletion. We may not have the time or energy for lengthy āsana practices or extended meditations right now. But if we’re tired and anxious there are simple, time-efficient ways to restore with yoga.

Reclining Bound Angle Pose (Supta Baddha Koṇāsana), accompanied by breath-work and focused awareness, can be a complete practice for deep relaxation. Do the best you can to find a quiet space to do this exercise. If it feels impossible to calm down, don’t be dissuaded. Regardless of how long you have available to rest in this posture, it will benefit your mind and body. Proceed without attachment to the outcomes, but with willingness and curiosity.


Step 1: Reclining Bound Angle Pose (Supta Baddha Koṇāsana)


Start in Corpse Pose (Śavāsana) and take a few breaths there. With each exhale loosen the muscles of your back, melting into the support of the floor. Bring the soles of your feet together at a comfortable distance from your pelvis, opening your knees wide. Place a block, cushion or rolled up towel under each knee. Allow these supports to bear the full weight of your legs, facilitating a release in your hips. Draw your tailbone down the mat, rolling your pelvis up towards your navel, creating space in your lower back. Tuck the chin slightly to lengthen the back of your neck and adjust as needed to ensure your spine is not compressed. Lay your head on a pillow and drape a blanket over your body. Close your eyes or soften your gaze, relax the muscles of your face, and position the hands in any way that feels best to you. Breathe naturally for several minutes. Remain in this posture for the duration of the practice, or for as long as it feels comfortable.


Step 2: Three Part Breath (Dīrgha Pranāyāma)


Place one hand on your abdomen and the other on your heart. Prop up your elbows with rolled towels if desired. Inhale from the space below your navel and send the breath seamlessly through your rib cage, extending the sides of your body, and then up into your chest until your lungs are full. Draw your shoulders towards the mat as your heart space opens. Exhale completely and with control. Allow your chest to fall, your ribs to reform and your navel to gently drop back towards the spine. With each breath cycle use the placement of your hands to feel the breath dance in your body.


Step 3: Withdraw the Senses (Pratyāhāra)


Disengage your senses from the world beyond your mat. Focus on your inward experience, rather than ambient noise, anxious thoughts, or unrelenting laundry lists. When your mind starts to wander, refocus on your breathing. If the thoughts persist, don’t be discouraged. Use your breath awareness as a shield from material distractions, as well as a guide for exploring the stillness and stability of your inner self. Pay attention to your breathing, but abandon all effort in your body. Be at ease in the unknown, the mystery of the self, an uncharted holy place.

May this practice bring you solace and peace, quell worry and fear, and serve as a place of refuge protected by the unassuming presence of your own breath. May it reveal the subtle complexities of your body, the transformative power of the āsanas, and the grace of praṇa. Above all, may it revitalize your spirit in times of great uncertainty.


Claire Papell is a writer and yoga teacher (RYT-500) committed to revealing and honoring the hard truths of being human. Her yoga education included extensive study of the rich tradition of bhakti-yoga – the yoga of devotional service. Through the reading of sacred texts, yogic philosophy and kirtan, she developed a deep and persistent wonderment about Spirit.
Claire believes the yoga tradition offers powerful tools for healing. She draws from personal experiences and her spiritual contemplations to present unique perspectives on grief, loss, and trauma. Through vivid language and a poetic voice, she hopes to connect closely to her readers. When leading a yoga class, Claire relates to her students with similar intention. Her personal yoga practice and teaching style emphasize thoughtful sequencing, steady pacing and unwavering emphasis on the breath. She designs each class to reveal what she values most about yoga, which is its remarkable ability to stretch our hearts – wonder-drenched and mystical places – so pain and joy, gratitude and grief can all exist, side by side.


​3 Restful Practices to Support Immunity

By Yoga, Yoga PracticeNo Comments


Fatigue and stress wreck havoc on the immune system. Whenever I get sick, it’s usually because work and worry have depleted my emotional, mental, and physical reserves. Rest is essential to our well-being. Taking breaks, slowing down, and sleeping well allow the body to do what it does best, which is defend and repair itself. Without the energy it needs to function, our immune system simply can’t keep up.
Incorporating rest into our busy lives can be quite challenging, but doing so trains our bodies and minds to relax when the world around us is moving very fast. I’m a big fan of personal practices that restore my sense of self. Carving out time for reflection, designing my space, and being creative, even for brief periods of time, nourish me physically and spiritually. Here are a few ideas for replenishing throughout the day, and I hope they inspire others.

1. Mindful Meals

I worked in food service for several years, and due to the demands of my job, I often ate standing up, while working, and at erratic times. My health suffered, particularly my digestion. If we eat on the go our digestive system doesn’t have the energy it needs to process our food and absorb nutrients because our body is busy doing something else. Without proper nourishment from our food our immune system doesn’t have the fuel it needs to fight illness.
Preparing and enjoying wholesome food is a method of self-healing. Mindfulness is practicing full awareness in the present moment, without reaction or judgement. Sitting at a table, enjoying the taste of our food, noticing the colors on our plates, chewing slowly, and pausing in between bites is a mindful practice that supports the body’s life-giving functions. Start the day with a slow breakfast. Set the table, remove clutter and light a candle. Whatever foods you have available, prepare them with care. Eat slowly and patiently, and sit for a while after you’ve finished. Doing so signals your body to focus on processing nutrients into energy.
 

2. Observing Nature

Walking is wonderful exercise and can be quite meditative if practiced with full awareness. Due to the coronavirus threat, walking outside may not feel safe right now, especially if you live in a crowded place. If that’s the case, there are other ways to slow down and notice your surroundings.
Observing our environment focuses the mind on the present moment, rather than our thoughts, which often exist in the past or future. When the mind slows down the body can rest. Spend a few minutes by an open window, on your front stoop, or in your backyard. Walk barefoot through the grass or sit with your eyes closed to soak up the sun. Notice the various sights and sounds, whether it’s lawn mowers or children playing, traffic noise or bird songs. If you see something beautiful, take time to delight in that experience. Slow down your movements or sit still, and disregard thoughts that pull you from the present moment.
 

3. Evening Rituals

To me sleep is a sacred time of renewal in order to greet the new day ahead with fresh eyes and a vibrant spirit. It’s the body’s optimal time to repair. A quick internet search will yield numerous articles linking the blue light emitted from digital screens to poor sleep. News and other information absorbed prior to bed can be over-stimulating and agitating. Establish a cut-off for screen time. Make yourself a calming cup of tea or soothing golden milk, and sit for a few moments to enjoy it. If you have time, silently meditate in a comfortable position. While lying in bed place one hand on your belly and the other on your heart. Take long, full breaths, feeling your chest and abdomen rise and fall with each inhale and exhale. Meditation and mindful breathing activate our parasympathetic nervous system, the one responsible for rest and renewal.

Rest is a form of nourishment. It’s essential to our health and will benefit us in even small doses. Deep sleep and mindful moments replenish our energy reserves so we don’t run out of what the body needs to stay well. Times of relaxation and quiet awareness are opportunities to learn about ourselves and relate to our bodies, which can foster trust in their resiliency, wholeness, and innate capacity to heal.


Claire Papell is a writer and yoga teacher (RYT-500) committed to revealing and honoring the hard truths of being human. Her yoga education included extensive study of the rich tradition of bhakti-yoga – the yoga of devotional service. Through the reading of sacred texts, yogic philosophy and kirtan, she developed a deep and persistent wonderment about Spirit.

Claire believes the yoga tradition offers powerful tools for healing. She draws from personal experiences and her spiritual contemplations to present unique perspectives on grief, loss, and trauma. Through vivid language and a poetic voice, she hopes to connect closely to her readers. When leading a yoga class, Claire relates to her students with similar intention. Her personal yoga practice and teaching style emphasize thoughtful sequencing, steady pacing and unwavering emphasis on the breath. She designs each class to reveal what she values most about yoga, which is its remarkable ability to stretch our hearts – wonder-drenched and mystical places – so pain and joy, gratitude and grief can all exist, side by side.


How Yoga Can Help With Anxiety Symptoms

By Yoga, Yoga PracticeNo Comments


Panic attacks and anxiety impacts our life in many ways, but there are a ton of coping tools available. However, during this time of the COVID-19 crisis, it might feel harder to utilize the tools that tend to be so widely available. For instance, gyms and yoga studios are closed, you might have lost some income, and we should be staying inside to help lessen the spread of this virus. This has created not only a lot of sudden change, but also much more anxiety, even in people who don’t struggle with anxiety on a regular basis.

Despite the challenges of panic attacks and other anxiety symptoms, there are many self-help strategies that can assist you in coping with these feelings. Activities such as breathing and other relaxation techniques are available to help you feel more calm, peaceful, and in control. Some of the most common strategies include breathing exercises, visualization work, and yoga. These techniques have been found to reduce anxiety and may even help panic attacks.
 
Yoga happens to be an activity that actually has all many relaxation techniques. Plus, yoga has been known to help ease stress, reduce feelings of nervousness, and enhance mindfulness. For these reasons, yoga can be a great tool during this time where many things are changing at once and feelings of anxiety can be extreme.
 
A small but intriguing study done at the University of Utah provided some insight into the effect of yoga on the stress response by looking at the participants’ responses to pain. The researchers noted that people who have a poorly regulated response to stress are also more sensitive to pain. Their subjects were 12 experienced yoga practitioners, 14 people with fibromyalgia (a condition many researchers consider a stress-related illness that is characterized by hypersensitivity to pain), and 16 healthy volunteers.

When the three groups were subjected to more or less painful thumbnail pressure, the participants with fibromyalgia — as expected — perceived pain at lower pressure levels compared with the other subjects. Functional MRIs showed they also had the greatest activity in areas of the brain associated with the pain response. In contrast, the yoga practitioners had the highest pain tolerance and lowest pain-related brain activity during the MRI. The study underscores the value of techniques, such as yoga, that can help a person regulate their stress and, therefore, pain responses.
 

Benefits of Yoga for Anxiety

Although many forms of yoga practice are safe, some are strenuous and may not be appropriate for everyone, especially if you are dealing with mental and physical anxiety.
 
For people dealing with depression, anxiety, or stress, yoga can be a great way to better manage symptoms. The scientific study of yoga demonstrates that mental & physical health are not just closely related, but are essentially deeply connected. Evidence is starting to prove that most yoga practices are a relatively low-risk, high-yield approach to improving overall health.
In 2011, Harvard published an analysis of data from a sample of people and found that 3% (the equivalent of nearly 6.4 million Americans) had been advised by their health care practitioners to use mind-body therapies like yoga and meditation — and more than a third of those patients had a diagnosis of anxiety.
 
“We’ve seen a significant uptick in referrals from psychologists, especially for patients with anxiety,” says Steve Hickman, PsyD, executive director of the University of California San Diego Center for Mindfulness, where health care practitioners — including psychologists — conduct mindfulness research and offer classes for patients. “Therapists and doctors are rethinking their attitudes toward meditative approaches largely because there’s a persuasive body of evidence showing that [these modalities] can help with stress and mood disorders.”
 

The Science Behind Yoga for Anxiety
 
The science in hundreds of studies have looked at the benefits of meditation for calming the mind, but possibly the most definitive paper was published in the journal of JAMA Internal Medicine. In the review, researchers at Johns Hopkins University analyzed 47 studies on meditation programs that involved at least four hours of training. “We found consistent evidence that mindfulness meditation reduced the symptoms of anxiety to some degree across studies,” said Madhav Goyal, MD, lead author and assistant professor of medicine. “When you’re anxious, your mind can get carried away with worrying about things that might happen, and that actually makes you feel worse and can cause other symptoms, like insomnia. Meditation teaches people certain skills that can help counteract that tendency, like staying in the moment, recognizing worried thoughts when they’re happening, and preventing them from getting worse.”

In the research, about 20 to 30 minutes of daily mindfulness meditation — a specific type that aims to cultivate awareness of present-moment thoughts, feelings, and experiences — showed the most promise. But there’s evidence that many other meditation types can be effective, as well. Based on his team’s findings, Goyal, a practicing internist, now recommends meditation not only to his patients with anxiety but also to those who are depressed and in physical pain — the two other conditions for which the study found the practice to be effective. “It works and it’s safe, and that’s a good combination,” he says.


Morgan Gertler received her 200HR RYT certification in 2014 from highly esteemed Kripalu teachers and then continued her learning in 2017 by completing her 300HR RYT certification with teachers from Yogamaya and the Iyengar Institute in NYC. Morgan also completed her Yin Level 1 & 2 trainings and loves being able to teach both sides, the yin & yang, of the yoga practice. Morgan views yoga as a vehicle to get back to yourself – through movement and breath-work, we learn how to live a more authentically happy & content life and meet all situations with confidence. When not teaching or practicing yoga, Morgan can be found writing, walking around town with her two dogs, Jagger and Bowie or browsing Sephora for more make up she doesn’t need. Morgan is also a regular content contributor for YogaRenew.


Cozy At Home Yoga Sequence

By Yoga, Yoga PracticeNo Comments


While staying at home, it can be easy to feel lazy, unmotivated to exercise, eager to eat more than usual or even overwhelmed and stressed about current events. In addition to stress, the weather is cold which lures you into your warm bed, often unwilling to physically challenge yourself in your practice. What if I told you that you can incorporate a slow-paced, restorative yoga sequence into your daily routine which will leave you relaxed and refreshed instead of sore and tired? Restorative yoga sequences usually consist of only a few asanas that are held for a minimum of 5 minutes in order to supply the full benefits of each asana. The following sequence provides a wonderful way to wind down during stressful times and treat your body without feeling exhausted.


1. Child’s Pose

Begin in Child’s Pose, sitting back on your heels with your knees spread apart. Extend your arms in front of you and allow your forehead to rest on the mat. Take a deep inhale and with every exhale, stretch your fingertips even further and let your hips sink down toward the mat. This asana is ideal to practice at the beginning and end of a restorative sequence as it provides a gentle stretch in the lower body while relaxing the upper body and releasing tension. After a few minutes of holding this asana, feel free to try variations. For instance, you can stretch your arms to either side or thread one arm under your torso toward the other side with the other arm extended forward for a deep shoulder stretch.

2. Happy Baby Pose


After you’ve relaxed in Child’s Pose for several minutes, slowly transition to Happy Baby Pose. To do this, walk your fingers toward your torso as you lift your upper body from the mat. Then, untuck your feet from beneath your sit bones and lie flat on your back with your knees bent. Bring your knees into your chest and grip the outsides of your feet or your big tones with your hands. Gently pull your feet outwards so that your knees open wide and you feel a deep stretch in your hips. You can choose to rock side to side for an even deeper release in the groin area or simply find stillness in this asana for a few minutes. With every exhale, allow your knees to drop closer towards the mat and focus on letting go of stress and tensions as you continue to breathe through this deep stretch.

3. Reclining Bound Angle Pose


From the previous asana, release your legs onto the mat with your knees still bent and opened outwards to each side. Make sure to position your feet close to your pelvis Bring the soles of your feet to touch. Remain lying down and allow your arms to rest by your side or on your abdomen. Close your eyes and focus on taking deep breaths for up to 5 minutes in this classic, restorative asana. The benefits include stimulation of the abdominal organs, circulation, and heart as well as a gentle stretch of the thighs and knees.

4. Legs-Up-the-Wall Pose

Transitioning from Reclining Bound Angle Pose, position yourself close to a wall and facing the wall, extend your legs up against it. Your back should remain straight and horizontal with your arms resting wherever they are comfortable. In this asana, your sit bones should be either touching the wall or close to it while supporting your legs and your body should be creating a 90 degree angle. Remain in this position for at least 5 minutes as you continue to breathe deeply and steadily. The benefits of this asana include increased circulation, a deep stretch in the lower back and hamstrings, stress relief, and relaxation of the pelvic floor. To exit this pose, slowly bend your knees and shift them to one side as you come to a seated position.

Step 5. Seated Forward Fold


Begin by sitting on the mat with a straight back and your legs extended in front of you. Feel free to sit on a folded blanket or a bolster for additional support. As you inhale, reach your arms up towards the sky and with a deep exhale, fold your body from your hips as you attempt to reach your knees, feet, or even toes. A key thing to remember is that the goal is not to force your fingertips to your toes; instead, focus on bringing your chest to your thighs, nose to your knees, and forehead to your legs during this stretch. With every exhale, allow tension to be released from your body and surrender even further in this asana. Some benefits of Seated Forward Fold include stress relief, a deep stretch in the shoulders and spine, and improve digestion.

Step 6. Corpse or Savasana Pose

Let’s end this sequence with a mindful asana to eliminate any meaningless thoughts and ground yourself. Keep your legs extended in front of you on the mat with your arms resting by your sides with your palms facing up. Make sure that your back is straight and there is no arch in your lower back as you lie flat on the mat. Close your eyes and feel your body sink as it becomes heavier with every breath. Corpse Pose is a favorite asana for many people due to its restorative nature. Corpse Pose is a pose of total relaxation which requires remaining in a neutral position, often a challenging task. The purpose of corpse pose is to consciously calm the mind which in turn, calms the nervous system and lowers blood pressure resulting in a state of ultimate serenity. The duration of this asana depends on your preference, however 10-20 minutes are recommended.


Don’t let the stress or being at home hinder your yoga practice and instead, let it nourish it! There’s nothing wrong with leaving hatha and ashtanga yoga aside during this time and focusing on restorative poses to feel relaxed, rejuvenated, and at peace.


Stella Versteeg was exposed to yoga early in life from her father – traveling to India to practice yoga with her family. Living in ashrams and being surrounded by the beautiful and intricate Indian culture, from a young age, Stella was able appreciate and learn about the origin of yoga as well as meditation. Stella received her 200 HR yoga training from YogaRenew in 2018. She currently runs a blog, Ride Your Wave Yoga, which shares yoga tips, poses, nutrition, travel and mindfulness. Her goal is to spread honesty, love and awareness about a yogic lifestyle through her blog posts as well as create a supportive, inspired community. She aspires to share as much information as possible about yoga to others.


​5 Common Yoga Injuries And How To Avoid Them

By Yoga, Yoga PracticeNo Comments


5 Common Injuries and How To Avoid Them


Over 30 million people worldwide practice yoga regularly. According to estimates, 14 million of those people include Americans who have been prescribed by a physician or other therapist because of yoga. Although the practice of yoga has earned a good reputation for promoting well-being, practitioners should be aware that a number of commonly taught yoga poses (or asanas, as they are referred to in class) can also be risky if done incorrectly. This calls to attention the importance of an experienced teacher, who is educated in the contraindications of each pose and the ability to communicate that information clearly to the practitioners. At the end of the day, that is as far as a yoga teacher can go to protect their students from injury. So are the therapeutic benefits of yoga worth the risk? (Yes, of course they are!)


1. Wrists

Often already aggravated by overuse of computer work and texting, the wrists are vulnerable small joints. Especially if arm balances and inversions are within your scope of practice, the wrists can be at risk for strain or injury if they are not properly prepared or overused.

A proper warm up and the gradual increment of pressure on the wrists before putting your full body weight on them is important to prevent muscular or structural damage. More specifically, you can help prevent injury by avoiding cupping the palms and turning the fingers inward. Yoga wedges, or a rolled up mat/towel, can help take extra pressure off the wrists and are great props. In addition, placing the knees on the ground to modify poses can help alleviate excessive pressure, as you work toward building strength in the wrists and shoulders.

2. Lower Back

Lower back pain is the most common complaint in the yoga community, due to rounding through the spine in poses like downward dog, forward folds, or keeping the legs too straight when getting into a pose. Rounding causes the spine to do the opposite of what it’s supposed to. Overstretching the major muscle groups in your back can lead to an unstable vertebra and poor intra abdominal pressure, a recipe for lower back discomfort.

In addition, the sacroiliac joint (SIJ), which contributes to spinal stability and connects the sacrum to the bones of the pelvis, may be aggravated by improper alignment.

The key to preventing lower back strain is slightly bending the knees in forward folds to allow the lower back to decompress. Keeping a micro-bend in the knees throughout the practice as needed is key. Make sure to slow down during twists and go in and out of them mindfully. Engaging the lower abdominals is also important because core strength and stability protect the spine.


3. Shoulders

One of the main reasons why shoulder injuries are common in yoga is because of the chaturanga- the transition from high to low push up that is often added to classes to make the experience more of a workout. Many students should be should be modifying or skipping chaturangas, but many of those people are looking to get the workout factor from the class.

As a rule of thumb, before the transition you should always keep the four Immaculate Dissection cues in tact: neck long, chin tucked, chest wide, ribs down. Then, shift your weight forward on the toes, bringing the shoulders right over the wrists, and transition to the low push up to a comfortable proximity to the ground, which will vary from person to person.


4. Knees

Tight hips or preexisting injuries can cause knee pain or discomfort around the knee. The common instructions to maintain proper alignment in poses that involve bending the knees are to track the kneecaps over the second middle toe, but that is something that can vary from person to person, depending on their circumstances and goals of their practice.

In many poses you can protect the knees by flexing the foot (like in pigeon pose or figure 4). You can also strengthen the quads and engage them throughout standing postures to avoid hyperextension of the knees. Prolonged hyperextension can lead to injury or chronic pain.


5. Neck

Neck issues often occur as a result of compression, which can lead to issues in the cervical vertebrae. This type of injury is highly intimidating because of the lengthy healing time necessary if they are to happen. Advanced postures like headstand and shoulder stand put a lot of pressure on the neck, especially if done misaligned.

It’s important to only attempt these postures after building the necessary strength to hold them for a few breaths and to go at your own pace, especially if you’re a beginner. It’s also important to warm up and always do a counterpose after advanced postures. A child’s pose after headstand is relieving and fish pose after shoulder stand is important.


A 2012 study conducted in Australia found that 20% of all yoga practitioners claim to have experienced a yoga-related injury at some point throughout their time practicing. Additionally, a 2016 study discussed how yoga-related injuries have nearly doubled from 2001 to 2014. When practicing yoga, it’s important to find a knowledgeable teacher but more importantly, a mindful approach of your own can protect you from injury and pain. Modify your practice as needed, go at your own pace, and take calculated risks when attempting new postures. Take care of your body, and it will take care of you.


Michelle Kirel aspires to share with as many people as possible the necessary tools to maintain a healthy, strong and resilient lifestyle. Michelle has a lifelong passion for yoga. She was exposed to yoga at an early age by her mother who is a certified Iyengar yoga instructor. It was during college when she started practicing daily and falling in love with the feeling that comes after a yoga class. Following graduation, Michelle completed her 200 hr certification training in Vinyasa Yoga to dive deeper into the ancient tradition. She currently combines her understanding of yoga with Neurokinetic Therapy to help people treat chronic pain, injuries and postural imbalances. She is also a content contributor for YogaRenew Teacher Training.Her goal is to continue to learn as much as possible to be able to help others.


Developing The Foundation Of Your Yoga Practice With Tadasana

By Yoga Poses, Yoga PracticeNo Comments


There are how-to instructions written on every yoga pose conceivable, whether in books, on the Internet, or in magazines. On social media, yogis of all body types and capabilities are making a name for themselves by offering yoga instruction in bite size segments with pictorial or video demonstration. Because information on nearly every pose in existence can be found online, I ask myself, what unique insight can I offer my readers that will positively benefit their practice? In submission, I humbly offer you the practice of Tadasana, the most basic, fundamental, and primary yoga pose. Tadasana is the one pose that I come back to everyday, every practice, and in every class I teach. While there are many poses that seem more dynamic, intense, and challenging, it is Tadasana that offers the most engagement and opportunity for introspection.

My daily practice begins with classical Surya Namaskar, which is repetitive cycle of twelve poses that both begins and ends in Tadasana. Because the engagement of Tadasana sets the foundational tone of the practice, its importance cannot be overstated. The form and focus of Tadasana is energetically mirrored within the varying poses of Surya Namaskar, from Downward Facing Dog to Plank Pose, and parallels positions like Hasta Tadasana, Extended Mountain Pose, and Bhujangasana, Cobra Pose. Beyond Surya Namaskar, Tadasana creates the base for all standing poses, particularly ones involving balance, like Vrikshasana, Tree Pose, and Svarga Dvijasana, Bird of Paradise Pose. Further, Tadasana’s stable form gives rise to backbends such as Ustrasana, Camel Pose, and Shalabhasana, Locust Pose. Seated, the energy of Tadasana informs Dandasana, Staff Pose, Paschimotonasana, Seated Forward Fold, Purvottanasana, East Pose, and inversions such as Sarvangasana, Shoulder Stand, and Shirshasana, Headstand.

Though there are multitudes of ways to set up Mountain Pose, such as standing with the feet hip’s distance apart with the palms facing forward, or with the hands together in Namaste’, my preferred way to align Mountain Pose is austere: feet together, big toes touching, arms at the side, palms facing inward. To begin, stand at the front of the mat and bring big toes together until they are firmly touching. To many, this first point of connection seems minor. However, pressing the big toes together is akin to connecting two live electrical wires—when they touch, energy flows. With the big toes pressing together, spread the remaining toes apart, and ground them back down to the floor. Making slight movements, balance the body’s weight evenly between the toes to the heels, and from the inside arches to the outside edges of the feet. Stand with balanced weight on both the right and left foot, weight distributed squarely across the front, back, inside, and outside of each.

Once the feet are in place, engage Tadasana by moving upwards in the body. Activate the calf muscles, straighten the knee joints, and contract the quadriceps firmly. Tighten the hamstring muscles, squeeze the inner thighs together, tuck the tailbone inwards, and engage the gluts. Lift the sternum upwards, roll the shoulders back and down, and straighten the elbows. With the palms facing the thighs, firmly reach the fingertips downwards as if they could touch the floor. Squeeze the armpits closed, and make the arms rigid, tight, and tense. Deeply engage the abdominal muscles, and activate the erector muscles of the spine. Draw the shoulder blades together and down towards the mid-back, and activate the muscles across the chest. Engage the whole body from the feet to the head.

Now, close your eyes. Keeping the whole body engaged, breathe. Take full ujjayi breaths and scan the body once more, beginning at the big toes, and all the way up again, engaging the whole body with awareness and breath. Keeping the body engaged, relax the neck, jaw, face, brow, and scalp. Sense the duality of the engaged, firm, tight, tense, activated body, paired with breath awareness and a purposeful softening of the face. The practice of Tadasana provides an introspective experience aligned with the true purpose of yoga. Physically, the yogi is activated and engaged in the manifest world. Internally, the yogi is calm, focused, and relaxed. In this way, Tadasana embodies the essence of a yogi.

Another term used for Tadasana is Samasthiti, a conjunction of two Sanskrit words: sama, meaning unmovable, stable, and sthiti, meaning standing still, steady. Therefore, Tadasana is a pose wherein the body is firm and unyielding, steadfast as a mountain. This is the energetic attitude of yogic lifestyle, one that is unwavering in practice, focus, and inner stillness. On a physical level, the entire pantheon of yoga asana is incepted from Tadasana. Aided with awareness and breath, Tadasana not only translates into all the shapes and forms made on the mat, but also into day-to-day living in terms of posture, gait, and body awareness. This lifestyle application goes further in terms of consistency, motivation, ambition, will power, and personal fulfillment. Both on the mat and off, Tadasana deepens self-awareness, highlights the capability of the body, fine tunes mental concentration, and promotes purposeful relaxation. In this way, the daily practice of Tadasana sets the foundation for spiritual awareness within a material world.


5 Physical Benefits Of Yoga Practice

By Yoga, Yoga PracticeNo Comments


The benefits of yoga can be categorized into a group of three components: physical, emotional and spiritual. Although all are important to maintain a healthy balance, this piece focuses on the physical and the benefits and of a regular asana practice. Some of the main physical benefits of yoga are increased strength, improved flexibility, better body posture, stronger spinal stability and a greater command of the breath.


1. Increased Strength

Asana, otherwise known as the physical practice of yoga, is only one of eight facets of yoga. Through asana practice, we achieve control of the body by positioning ourselves into different postures that strengthen and tone our muscles and organs. In every pose, we focus on engaging the bandhas, or energy centers in the body. Tapping into uddiyana bandha, for example, requires us to pull the belly in and up, toning and strengthening everything around the abdomen, including the abdominal muscles and organs nearby. By flowing through and repeating yoga poses, the body learns to hold these postures more comfortably and creates muscle memory for the next time we practice. The more we practice, the stronger the physical body becomes.


2. Improved Flexibility

In addition to becoming stronger, we become more flexible with a regular practice. Most yoga postures can be categorized into one of the following: standing, balancing, forward fold, backbend, and hip opening postures. Each one of these categories focuses on lengthening different areas of the body, and therefore increasing the flexibility of the muscles around those areas. Backbends, for instance, improve the flexibility of the front body (quads, abdomen, front of the neck). On the flipside, forward folds lengthen the back body (hamstrings, spinal erectors, calf muscles). Similar to how the body becomes stronger and better at performing a movement the more we repeat it, the same applies to the flexibility of a muscle group. The more we position our bodies into a certain position that stretches a particular muscle group, the more comfortable and deeper we can settle in that position.


3. Better Body Posture

In addition, having a strong and flexible body help contribute to healthy body posture. The spine is comprised of 33 vertebrae. This collection of bones is stabilized by muscles that help keep the upper body straight up. Sometimes after sitting for long periods of time or when our muscles grow tired, these spinal stabilizers don’t do a very good job at securing the spine and we either slouch or rely on the strength of the neck muscles to hold us up. Overtime, poor body posture can produce chronic pain or nerve impingements, like sciatica. Therefore, it’s critical for the spinal stabilizers to be strong and healthy to stay pain free.


4. Stronger Spine

Proper body posture throughout the practice of yoga is important to maintaining a strong spine. Through constant practice, the body learns how to shift its center of gravity to hold different poses. For each pose, the spine is lifting, flexing, extending or rotating. Each of these movements strengthen the different muscles that support the spine helping prevent compressed discs and maintaining the necessary space between each vertebrae. A strong spine is key to preventing many types of injuries, particularly spinal injuries. However, ankle, wrist, knee and hip injuries can also be prevented by maintaining a strong and flexible spine, naturally developed with a regular yoga practice.


5. Control of the Breath

Most importantly, one of the main physical benefits of practicing yoga is mastering a greater command of the breath. It has been said that if you can control the breath, you can control the mind. It’s one of the tools that connects the body to the mind. This connection allows us to access a parasympathetic state, which is the opposite of fight or flight. Practicing yoga helps us control our breath by putting us in a position where we must hold poses, some rather uncomfortable at times, and simply breathe. In Ashtanga yoga, for example, each posture is held for five slow breaths. Not only does each exhale allow us to better access a posture, but the awareness of the breath also brings us to the present moment, which can be difficult to achieve throughout the rest of our day-to-day. By mastering better command of the breath, we achieve a better control of our bodies and minds.


In short…

The physical practice of yoga is incredibly beneficial to the human body. The more we practice, the stronger and more flexible we become, contributing to healthy body posture, a stronger spine and better breathing mechanics. These physical benefits allow us to keep up with our daily activities pain free.


Michelle Kirel aspires to share with as many people as possible the necessary tools to maintain a healthy, strong and resilient lifestyle. Michelle has a lifelong passion for yoga. She was exposed to yoga at an early age by her mother who is a certified Iyengar yoga instructor. It was during college when she started practicing daily and falling in love with the feeling that comes after a yoga class. Following graduation, Michelle completed her 200 hr certification training in Vinyasa Yoga to dive deeper into the ancient tradition. She currently combines her understanding of yoga with Neurokinetic Therapy to help people treat chronic pain, injuries and postural imbalances. Her goal is to continue to learn as much as possible to be able to help people move better, feel better, and stay inspired.