Category

Yoga

​5 Common Yoga Injuries And How To Avoid Them

By Yoga, Yoga PracticeNo Comments


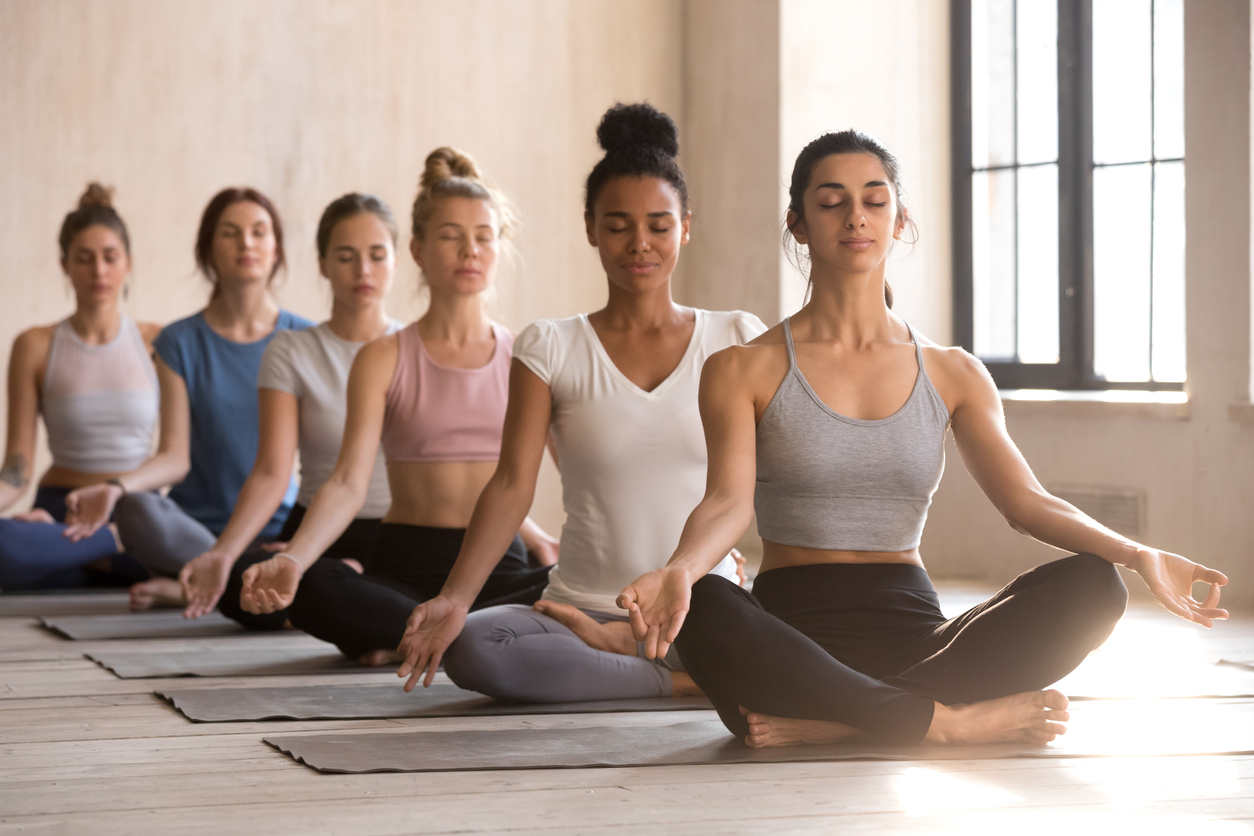
5 Common Injuries and How To Avoid Them


Over 30 million people worldwide practice yoga regularly. According to estimates, 14 million of those people include Americans who have been prescribed by a physician or other therapist because of yoga. Although the practice of yoga has earned a good reputation for promoting well-being, practitioners should be aware that a number of commonly taught yoga poses (or asanas, as they are referred to in class) can also be risky if done incorrectly. This calls to attention the importance of an experienced teacher, who is educated in the contraindications of each pose and the ability to communicate that information clearly to the practitioners. At the end of the day, that is as far as a yoga teacher can go to protect their students from injury. So are the therapeutic benefits of yoga worth the risk? (Yes, of course they are!)


1. Wrists

Often already aggravated by overuse of computer work and texting, the wrists are vulnerable small joints. Especially if arm balances and inversions are within your scope of practice, the wrists can be at risk for strain or injury if they are not properly prepared or overused.

A proper warm up and the gradual increment of pressure on the wrists before putting your full body weight on them is important to prevent muscular or structural damage. More specifically, you can help prevent injury by avoiding cupping the palms and turning the fingers inward. Yoga wedges, or a rolled up mat/towel, can help take extra pressure off the wrists and are great props. In addition, placing the knees on the ground to modify poses can help alleviate excessive pressure, as you work toward building strength in the wrists and shoulders.

2. Lower Back

Lower back pain is the most common complaint in the yoga community, due to rounding through the spine in poses like downward dog, forward folds, or keeping the legs too straight when getting into a pose. Rounding causes the spine to do the opposite of what it’s supposed to. Overstretching the major muscle groups in your back can lead to an unstable vertebra and poor intra abdominal pressure, a recipe for lower back discomfort.

In addition, the sacroiliac joint (SIJ), which contributes to spinal stability and connects the sacrum to the bones of the pelvis, may be aggravated by improper alignment.

The key to preventing lower back strain is slightly bending the knees in forward folds to allow the lower back to decompress. Keeping a micro-bend in the knees throughout the practice as needed is key. Make sure to slow down during twists and go in and out of them mindfully. Engaging the lower abdominals is also important because core strength and stability protect the spine.


3. Shoulders

One of the main reasons why shoulder injuries are common in yoga is because of the chaturanga- the transition from high to low push up that is often added to classes to make the experience more of a workout. Many students should be should be modifying or skipping chaturangas, but many of those people are looking to get the workout factor from the class.

As a rule of thumb, before the transition you should always keep the four Immaculate Dissection cues in tact: neck long, chin tucked, chest wide, ribs down. Then, shift your weight forward on the toes, bringing the shoulders right over the wrists, and transition to the low push up to a comfortable proximity to the ground, which will vary from person to person.


4. Knees

Tight hips or preexisting injuries can cause knee pain or discomfort around the knee. The common instructions to maintain proper alignment in poses that involve bending the knees are to track the kneecaps over the second middle toe, but that is something that can vary from person to person, depending on their circumstances and goals of their practice.

In many poses you can protect the knees by flexing the foot (like in pigeon pose or figure 4). You can also strengthen the quads and engage them throughout standing postures to avoid hyperextension of the knees. Prolonged hyperextension can lead to injury or chronic pain.


5. Neck

Neck issues often occur as a result of compression, which can lead to issues in the cervical vertebrae. This type of injury is highly intimidating because of the lengthy healing time necessary if they are to happen. Advanced postures like headstand and shoulder stand put a lot of pressure on the neck, especially if done misaligned.

It’s important to only attempt these postures after building the necessary strength to hold them for a few breaths and to go at your own pace, especially if you’re a beginner. It’s also important to warm up and always do a counterpose after advanced postures. A child’s pose after headstand is relieving and fish pose after shoulder stand is important.


A 2012 study conducted in Australia found that 20% of all yoga practitioners claim to have experienced a yoga-related injury at some point throughout their time practicing. Additionally, a 2016 study discussed how yoga-related injuries have nearly doubled from 2001 to 2014. When practicing yoga, it’s important to find a knowledgeable teacher but more importantly, a mindful approach of your own can protect you from injury and pain. Modify your practice as needed, go at your own pace, and take calculated risks when attempting new postures. Take care of your body, and it will take care of you.


Michelle Kirel aspires to share with as many people as possible the necessary tools to maintain a healthy, strong and resilient lifestyle. Michelle has a lifelong passion for yoga. She was exposed to yoga at an early age by her mother who is a certified Iyengar yoga instructor. It was during college when she started practicing daily and falling in love with the feeling that comes after a yoga class. Following graduation, Michelle completed her 200 hr certification training in Vinyasa Yoga to dive deeper into the ancient tradition. She currently combines her understanding of yoga with Neurokinetic Therapy to help people treat chronic pain, injuries and postural imbalances. She is also a content contributor for YogaRenew Teacher Training.Her goal is to continue to learn as much as possible to be able to help others.


5 Physical Benefits Of Yoga Practice

By Yoga, Yoga PracticeNo Comments


The benefits of yoga can be categorized into a group of three components: physical, emotional and spiritual. Although all are important to maintain a healthy balance, this piece focuses on the physical and the benefits and of a regular asana practice. Some of the main physical benefits of yoga are increased strength, improved flexibility, better body posture, stronger spinal stability and a greater command of the breath.


1. Increased Strength

Asana, otherwise known as the physical practice of yoga, is only one of eight facets of yoga. Through asana practice, we achieve control of the body by positioning ourselves into different postures that strengthen and tone our muscles and organs. In every pose, we focus on engaging the bandhas, or energy centers in the body. Tapping into uddiyana bandha, for example, requires us to pull the belly in and up, toning and strengthening everything around the abdomen, including the abdominal muscles and organs nearby. By flowing through and repeating yoga poses, the body learns to hold these postures more comfortably and creates muscle memory for the next time we practice. The more we practice, the stronger the physical body becomes.


2. Improved Flexibility

In addition to becoming stronger, we become more flexible with a regular practice. Most yoga postures can be categorized into one of the following: standing, balancing, forward fold, backbend, and hip opening postures. Each one of these categories focuses on lengthening different areas of the body, and therefore increasing the flexibility of the muscles around those areas. Backbends, for instance, improve the flexibility of the front body (quads, abdomen, front of the neck). On the flipside, forward folds lengthen the back body (hamstrings, spinal erectors, calf muscles). Similar to how the body becomes stronger and better at performing a movement the more we repeat it, the same applies to the flexibility of a muscle group. The more we position our bodies into a certain position that stretches a particular muscle group, the more comfortable and deeper we can settle in that position.


3. Better Body Posture

In addition, having a strong and flexible body help contribute to healthy body posture. The spine is comprised of 33 vertebrae. This collection of bones is stabilized by muscles that help keep the upper body straight up. Sometimes after sitting for long periods of time or when our muscles grow tired, these spinal stabilizers don’t do a very good job at securing the spine and we either slouch or rely on the strength of the neck muscles to hold us up. Overtime, poor body posture can produce chronic pain or nerve impingements, like sciatica. Therefore, it’s critical for the spinal stabilizers to be strong and healthy to stay pain free.


4. Stronger Spine

Proper body posture throughout the practice of yoga is important to maintaining a strong spine. Through constant practice, the body learns how to shift its center of gravity to hold different poses. For each pose, the spine is lifting, flexing, extending or rotating. Each of these movements strengthen the different muscles that support the spine helping prevent compressed discs and maintaining the necessary space between each vertebrae. A strong spine is key to preventing many types of injuries, particularly spinal injuries. However, ankle, wrist, knee and hip injuries can also be prevented by maintaining a strong and flexible spine, naturally developed with a regular yoga practice.


5. Control of the Breath

Most importantly, one of the main physical benefits of practicing yoga is mastering a greater command of the breath. It has been said that if you can control the breath, you can control the mind. It’s one of the tools that connects the body to the mind. This connection allows us to access a parasympathetic state, which is the opposite of fight or flight. Practicing yoga helps us control our breath by putting us in a position where we must hold poses, some rather uncomfortable at times, and simply breathe. In Ashtanga yoga, for example, each posture is held for five slow breaths. Not only does each exhale allow us to better access a posture, but the awareness of the breath also brings us to the present moment, which can be difficult to achieve throughout the rest of our day-to-day. By mastering better command of the breath, we achieve a better control of our bodies and minds.


In short…

The physical practice of yoga is incredibly beneficial to the human body. The more we practice, the stronger and more flexible we become, contributing to healthy body posture, a stronger spine and better breathing mechanics. These physical benefits allow us to keep up with our daily activities pain free.


Michelle Kirel aspires to share with as many people as possible the necessary tools to maintain a healthy, strong and resilient lifestyle. Michelle has a lifelong passion for yoga. She was exposed to yoga at an early age by her mother who is a certified Iyengar yoga instructor. It was during college when she started practicing daily and falling in love with the feeling that comes after a yoga class. Following graduation, Michelle completed her 200 hr certification training in Vinyasa Yoga to dive deeper into the ancient tradition. She currently combines her understanding of yoga with Neurokinetic Therapy to help people treat chronic pain, injuries and postural imbalances. Her goal is to continue to learn as much as possible to be able to help people move better, feel better, and stay inspired.


Yoga & Neurokinetic Therapy: The Missing Link

By Yoga, Yoga PracticeNo Comments


Yoga teacher training certification courses are available everywhere and at anytime: semester long classes, retreats and online. You can be a certified teacher within a month or even take a crash course in less time than that. As a teacher, it is then your responsibility to continue to improve yourself, add to your toolbox, and expand your teaching horizons. Continued education courses and additional certifications are a great way to brush up on your anatomy, explore new styles, and maybe deviate a little from classic yoga and find a way to integrate what you learn.


Shortly after completing my 200-hour certification, I found a form of manual therapy that focuses on aligning posture, rehabbing injuries and chronic pain. It sparked an interest because a lot of my yoga students often told me about their injuries or chronic pain and their struggle to find more than temporary relief. I felt like I had found the approach that cracked the code to lasting solutions to such cases.


Neurokinetic Therapy® (NKT) is a therapeutic approach based on Motor Control Theory that uses sequenced muscle-tests and soft-tissue releases to restore pain-free movement and eliminate compensation patterns in the body. Simply put, NKT allows you to pinpoint which muscles aren’t working and then tries to figure out why.


NKT changed my life. Thanks to this approach, I began thinking about the anatomy of the human body in a completely new way, understanding not only where different muscles are located but how they might work together to create certain movement patterns. I also began to pick up on typical compensation patterns that occur after injuries, persistent poor posture or simply from a sedentary lifestyle. This was a game-changer to my teaching abilities and to my students.


I restructured all of my classes. I tried to address the most frequent complaints I heard from my yogis. “My back hurts,” “my neck feels tight,” “I have shooting pain down one of my legs,” “I do ab exercises every day and don’t see any results.”


My classes focused on stabilizing the intrinsic core, breathing mechanics and proper alignment. I applied NKT concepts to how I sequenced each class. For example, I like addressing low back pain. People that spend long hours sitting down end up shortening their hip flexors. After those extended periods of time, the hip flexors have a difficult time lengthening back into their healthy length. This creates a tug on the low back that can produce chronic low back pain. It’s crucial that we reverse all those hours sitting down and return the hip flexors to a proper range in order to maintain a healthy lordosis.


With these new sequences, my regular practitioners started noticing a difference. I also started offering treatment sessions outside of my group classes. Those sessions were the most rewarding for the people looking for pain relief and more specific injury rehabilitation.


I had a female student who frequented my evening classes who suffered from a frozen shoulder. She had already tried acupuncture, massage therapy, physical therapy and could not find the relief she was looking for. After all the treatment she had received, she still only had about 30% range of motion.


In the first session, we were able to significantly increase this range to about 50%. She was in shock. She progressed more in a single session than she had with all the other modalities combined. NKT protocol revealed that the internal rotators of her shoulder, especially the pec minor, were not firing correctly, creating compensatory patterns. I assigned her corrective exercises to do twice daily and monitored her progress during yoga. It wasn’t very long before she had regained almost full range of motion and was performing chaturanga transitions instead of skipping them. She was thrilled after almost having lost hope of regaining her shoulder mobility. She put in the work, and the results showed.


Neurokinetic Therapy® is a type of treatment practiced by many professionals who use manual therapy: physical therapists, massage therapists, MD’s, DO’s, acupuncturists, personal trainers, occupational therapists, Pilates instructors and yoga teachers. Practitioners are spread out around the globe and can be found through the official website’s directory. NKT is a three-level course that can transform the practice of manual therapists and help them address issues more specifically and proficiently. As a yoga teacher who practices NKT, I highly recommend finding an NKT certified professional if you’re looking for an efficient, relatively speedy, and therefore cost-effective recovery plan.

Michelle Kirel aspires to share with as many people as possible the necessary tools to maintain a healthy, strong and resilient lifestyle. Michelle has a lifelong passion for yoga. She was exposed to yoga at an early age by her mother who is a certified Iyengar yoga instructor. It was during college when she started practicing daily and falling in love with the feeling that comes after a yoga class. Following graduation, Michelle completed her 200 hr certification training in Vinyasa Yoga to dive deeper into the ancient tradition. She currently combines her understanding of yoga with Neurokinetic Therapy to help people treat chronic pain, injuries and postural imbalances. Her goal is to continue to learn as much as possible to be able to help people move better, feel better, and stay inspired.

5 Yoga Poses To Boost Your Productivity

By Yoga, Yoga PosesNo Comments


It’s no secret that yoga has so many benefits from building strength and flexibility to finding calm and stillness of the mind – but did you know it can also help to boost productivity? Although most associate yoga with relaxation, the practice is also nourishing for the central nervous system and can help boost energy and motivation.

The next time you are needing an increase in productivity, take a moment to pause and try one of these five poses instead of going for that second (or third) cup of coffee. You’ll be glad you did!

1. Easy pose (Sukhasana)


Sometimes with a lack of productivity all you need is to reduce distraction and get still by centering yourself. Easy pose is the perfect way to accomplish this.

To get into the pose you simply come to a seated cross legged position. You can allow your hands to rest wherever feels most comfortable for your shoulders. There is also the option to take a mudra, which is a hand gesture used to facilitate the flow of energy in the subtle body. Gyan mudra, known to promote concentration, is taken by bringing your thumb and index finger to touch.

Once you arrive in your easy pose take about 5 to 10 slow even breaths to help you center and realign. Afterwards you will notice a sense grounding, more ease, and, hopefully, increased concentration for productivity.

2. Downward Facing Dog (Adho Mukha Svanasana)


One of the benefits of mild inversions, like Downward Facing Dog, is its energizing qualities. Whenever your heart is placed over your head the brain is supplied with more oxygen as blood flows which increases concentration and mental function.

To get into the pose, start in a table top position on your hands and knees. Tuck your toes and lift your hips creating a shape of an upside down “V”. Feet are about hip distance apart or wider and you will press firmly into all points of your hands especially between your middle finger and thumb. Lengthen your spine by lifting your tailbone towards the sky and gently press your belly towards your thighs taking the gaze between the feet.

Find about 5 breaths in this posture and experiencing the benefits of “resetting” the nervous system.

3. Tree pose (Vrksasana)

Challenging your balance is one sure way to boost productivity. Whenever your center of gravity is confronted you are forced to tune your drishti, or focal point, in order to be successful.

Find Tree pose by balancing on one leg, opening the hip of the opposite leg and either placing the foot at your ankle as a kickstand, at the shin, or above the knee.

Make this pose more difficult by reaching the arms towards the sky overhead or closing the eyes. By shifting your balance you are forced to check in and make adjustments through your body in order to stay lifted. Regular practice of this pose can improve concentration, balance, and coordination.

4. Camel pose (Ustrasana)


Heart opening or back-bending postures like Camel pose help to quiet all of the chatter in the mind. Some consider this pose to be quite challenging as you are vulnerably opening a part of your body that is often shielded and protected, your heart.

Beginning in a kneeling position on your knees, bring your hands to your low back with fingers pointed down as if you were going to slide them into your back pockets. Slowly shift the hips forward as you draw the elbows and shoulder blades towards one another creating an opening through your thoracic spine. Slowly work towards the fullest variation by bringing your hands to the back of the heels as you continue to shift your hips forwards.

Camel requires a great deal of concentration and focus on the breath which is sure to increase productivity as well as help with your posture if you are sitting at a desk all day.

5. Mountain pose (Tadasana)


As a pose that seems pretty simple and straight forward, Mountain pose offers great benefits of improving concentration and focus in order to be more productive.

Beginning in a standing position with your arms at your side, roll your shoulder blades down the spine and bring your hands to face forward. Notice the grounding through all points of your feet, perhaps lifting up the toes and rooting them back down. Activate your quadricep muscles in your thighs by slightly lifting the knee caps, and hug your belly button up and in towards your spine.

For an extra boost, bring your hands to your hips in order to bring yourself into a power position and take a few grounding breaths to build confidence.

Standing proudly and with intention can surely ignite your focus in order to be more productive.


Vanessa was first introduced to yoga in July 2013. Beginning as an outlet during a stressful time in her life, yoga ultimately turned into a consistent practice for her on the quest for total wellness. She started self-teaching
in the comfort of her own home for 3 years before deciding to participate in group classes at a local studio. Falling in love with the physical, mental, and spiritual aspects of yoga,
Vanessa decided to enroll in yoga teacher training in spring of 2017 in order
to share the art with those around her.


Currently residing in the DMV, she is a Yoga Alliance 200-hr registered yoga teacher and a certified Usui
Reiki Practictioner. She believes in order to live a life with intention we must take priority in caring for our mind, body, and spirit first.


8 Beach Yoga Poses

By Yoga, Yoga PosesNo Comments


8 Yoga Poses for the Beach

Needless to say, the restorative and relaxing effects of yoga compliment the scenic and serene atmosphere of the beach. Working in Catalina Island during the summer inspired me to embark on my yoga practice while expanding my knowledge about the physical, mental and spiritual benefits of yoga. You can always use a towel or yoga mat to support your postures or simply embrace the imperfect, sandy foundation beneath you. Sand can be especially beneficial for practicing challenging and balancing poses because it provides a soft cushion for your body if you happen to fall out of a pose. The beauty of sand is that it conforms to your body; you can create small mounds to support your knees or flatten it out entirely to support your forearms during inversions. Let’s not forget the fresh, salty breeze and the sound of ocean waves complimenting your beautiful flow. I’m eager to share some excellent asanas for your next seaside practice which will make you fall in love with yoga all over again.

1. Downward Facing Dog (Adho Mukha Svanasana)


This pose is very popular in yoga sequences, especially in vinyasa yoga. The benefits of Downward Facing Dog include stretching the hamstrings, calves, shoulders and hands while strengthening the legs and arms. It also makes your feel energized and helps calm the brain which makes it an ideal pose to relieve stress. This classic yoga pose can be practiced pretty much anywhere however, practicing it on the sand can allow your body to sink even deeper into it. Begin in tabletop position with your knees stacked directly under your hips and your wrists stacked under your shoulders. Exhale while tucking your toes and lifting your knees off the sand. Spread your fingers and press your hands down in front of you while straightening your back as much as possible. Gently bend your knees, one at a time, working your way into your own version of Downward Facing Dog. Bring your gaze towards your feet while aligning your hand with your spine creating a straight line. Take a few deep breaths and when you’re ready to exit the pose, gently lower your knees back onto the sand into tabletop position and release into Child’s Pose.

2. Tree Pose (Vrksasana)


I don’t know about you but something about being by the ocean provides peacefulness and balance to my body and soul; why not practice a pose that embodies that? Benefits of this pose include stretching the thighs, core and shoulders while strengthening the spine, thighs and calves. Tree Pose is a great way to ground yourself and focus on your breathing while improving your balance. Begin in Mountain Pose (Tadasana); inhale while lifting your arms towards the sky and exhale, bringing your hands by your heart. Choose a focal point to provide balance and slowly lift your right foot off the sand and place it on your left ankle. Taking your time, lift your right foot further until it reaches the side of your left knee. Take a few deep breaths here and whenever you’re ready. return to Mountain Pose; repeat this pose on the opposite side.

3. Shoulder Stand (Sarvangasana)


This might seem like an odd pose to practice on the beach but the combination of an inverted posture and a serene, ocean atmosphere will undoubtedly relax you to the core. Be cautious when practicing a shoulder stand because it is definitely e a more advanced pose. The benefits of this pose include relieving stress and depression, strengthening the glutes, arms, core, legs and arms as well as improving digestion. To get into this pose, start by laying down on your mat (or the sand) and bring your knees towards your face. Bring your hands to your hips to support your lower body and lift your hips and legs towards the sky while trying to keep them straight. Take a few deep breaths; to exit the pose, slowly lower your hips and legs to the ground. You can also choose to stay in a shoulder stand in order to transition to the next posture. The best part? Even if you happen to lose your balance during this asana, the sand provides a soft cushion to avoid injuries.

4. Plow Pose (Halasana)


This pose is excellent at reducing back pain and stress, calming the mind and stretching the spine and shoulders. To get into this pose, simply begin in a shoulder stand and slowly bring your extended legs back towards your head until your toes touch the mat behind your head. Remember to bring your chin away from your sternum and keep your hands on your lower back for additional support or release them onto the mat and stretch them behind you. This pose can be held for a few minutes; when you feel ready to exit, bring your hands to your lower back again and exhale while slowly lowering your legs down towards. This a a great pose for the beach because it encourages deep relaxation and stress relief.

5. Bow Pose (Dhanurasana)


Take a deep breath and say goodbye to any tension. Being by laying on your stomach with your arms extend by your sides with your palms up. Take a deep exhale and reach for your heels with your hands while bending your knees. Hold onto your feet while trying to lift your thighs slightly off the mat and gaze forward. Keep i mind that it might be harder to breathe in this posture but make sure to keep breathing steadily. Stay in this pose for about 30 seconds and release your legs and arms towards the mat while taking a deep exhale. The benefits of this pose include improving your posture, strengthening the back muscles and stretching your thighs, core, chest, throat and hips.

6. Pigeon Pose (Kapotasana)


This pose is wonderful at lengthening the hip flexors, preparing the body for backbend poses as well as opening the hip joint and reducing stress and anxiety. Begin in seated position with your feet tucked under your glutes. Extend your right leg back on the mat while keeping your left leg bent in front of you. Take a deep inhale and as you exhale, release your body onto your front leg and extend your arms on the mat in front of you. Try to bring your forehand to touch the mat and close your eyes. Take a few deep breaths, allowing your body to sink even deeper into the pose with every exhale. To exit the asana, slowly walk your hands back up towards your torso and return to seated position.

7. Easy Pose (Sukhasana)


Now, let’s take a moment to sit still and breathe. Sit comfortably with your legs crossed, your spine straight and your hands in your lap. Close your eyes and take several deep breaths, trying to hold your inhale for a few seconds before exhaling. Try to eliminate any stressful or negative thoughts while bringing your entire focus o your breath. While continuing to breathe deeply, bring your attention to the sound of the ocean waves crashing endlessly against the shore, one by one. Inhale the fresh, salty breeze and feel your body sinking heavily into the sand.Let go of any fear or stress about what will happen tomorrow or the day after because all that is guaranteed is this moment, sitting cross legged on the sand in front of the vast ocean that covers our beautiful planet. In this moment, you are blessed and all you can do is immerse yourself in gratitude. You can attempt the Ujjayi breath which is often referred to as the “oceanic breath” and it is used to synchronize your breathing with the asana. This wonderful technique will enhance your yoga practice as well as increase the oxygen in your blood, relieve tension, detoxify your body and mind as well as help to increase your mind-body awareness. The Ujjayi breath consists of breathing through your nose, inhaling deeply and exhaling slowly through your nose. To practice, open your mouth and exhale making a “ha” sound. Noe, try this with your mouth closed but maintain the intensity of your exhalations. Every time your exhale, it should sound like ocean waves and this technique is ideal to practice while you’re in easy pose, during hatha yoga or simply when you’re stressed or frustrated.

8. Corpse Pose (Savansana)


This posture will help you relax even more after getting out of Easy pose. Lay down on your mat or the sand with your legs extended in front of you and your arms by your sides with your palms facing up towards the sky. Close your eyes and bring your awareness to your breath once again but this time, don’t force deep inhalations or exhalations; instead, breathe naturally and simply bring your attention to your breathe. Allow the soothing sounds around you to increase your sense of mindfulness and purpose. The benefits of this asana are endless, a few of which are body awareness, stress reduction, better sleep quality and deep mind relaxation. This asana can be held for anywhere from 5 minutes to an hour and it might just end up in a wonderful nap in the sun.

What are you waiting for? Head to the beach and take some time to indulge in these asanas; you deserve that time to gain perspective and awareness. Take the time to leave any stress that you might be experiencing behind and relax yourself physically, mentally and spiritually. The past has already happened and the future is uncertain so all that really matters is this present moment, right here, right now. Submerge yourself in an abundance of spiritual awareness, gratitude and bliss.

Let’s ride your wave, together.

Namaste.


Stella Versteeg was exposed to yoga early in life from her father – traveling to India to practice yoga with her family. Living in ashrams and being surrounded by the beautiful and intricate Indian culture, from a young age, Stella was able appreciate and learn about the origin of yoga as well as meditation. Stella received her 200 HR yoga training from YogaRenew in 2018. She currently runs a blog, Ride Your Wave Yoga, which shares yoga tips, poses, nutrition, travel and mindfulness. Her goal is to spread honesty, love and awareness about a yogic lifestyle through her blog posts as well as create a supportive, inspired community. She aspires to share as much information as possible about the wonderful lifestyle that yoga has to offer and continuously evolve in her personal own practice.

5 Yoga Poses For Inner Strength

By Yoga, Yoga PosesNo Comments


Confidence and inner strength are such powerful tools in achieving productivity, success, and happiness. Yoga is a wonderful way to develop and nurture your sense of inner strength. because it is not just a physically strengthening and revitalizing practice but it’s also a sign of positivity, love, and self-care towards yourself. Taking the time from your busy routine to still your mind and breath as well as focus on your physical, mental, and spiritual well-being builds your sense of self-worth. As you progress in your practice, you will learn that yoga is physically challenging and the stronger you get on the outside, the stronger you will feel on the inside. Being able to persist in your practice with patience, understanding and forgiveness will nurture your sense of inner strength over time. Take time to practice this yoga sequence to eliminate feelings of self-doubt and reveal your inner peace and strength!


1. Warrior I (Virabhadrasana I)

The image of a warrior is illustrated by strength, courage, persistence, and confidence which is exactly what the Warrior asanas exude. The rich symbolism of the Warrior asanas refers to the underlying story of the Hindu warrior, Virabhadra. Warrior I is a beautiful posture that will empower you and activate your inner warrior by improving your strength and flexibility. Begin in Mountain Pose (Tadasana) and gently step your feet a few feet apart from each other. Reach both of your arms up towards the sky with your palms touching while bringing your gaze up towards your hands. Next, slightly turn your left foot to the right so that your toes are pointing to the left of your body. Gently rotate your torso to the right and bend your right knee while making sure that your knee does not pass your toes. Hold this asana for 30 seconds-1 minute while focusing on your breath and channeling feelings of confidence and strength. Slowly release back to Tadasana and repeat this posture on the other side.

2. Warrior II (Virabhadrasana II)

Transitioning into Warrior II will combine balance with core strength as well as ultimate focus. After Warrior I, return to Mountain Pose (Tadasana) and bring your left foot a few feet back on the mat while bending your right knee into a lunge without your knees passing your toes. Extend both of your arms by your sides so that they are parallel to the mat aligning straight with your legs and bring your gaze forward. Make sure that your torso is twisted to your left and draw your shoulder blades down your back. Take several deep breaths here while pressing down with your feet and engaging your core. This asana is beneficial for your entire body because it strengthens your shoulders, arms, and legs as well as improves your balance and stability. Warrior II will improve your ability to concentrate and focus with more clarity while building your physical and spiritual strength.

3. Warrior III (Virabhadrasana III)


Return once again to Mountain Pose (Tadasana) and take a moment to bring your focus back to your breath. Warrior III requires significant balance and focus which are best achieved when your mind is not wandering. The benefits of this empowering asana include improved coordination, stability, and balance, strengthening of the legs and core as well as a deep stretch of the upper body. Take a deep inhale, reach your arms up towards the sky and on your exhale, slowly lift your left leg off the mat while lowering your torso forward. Allow your arms to lead your torso until it is parallel with the mat and so that your body creates a “T” shape. Flex your left foot and press firmly with your right foot, spreading your toes if that helps to maintain your balance. Hold this asana for several breaths while focusing on finding your center of gravity. To ease out of this asana, slowly return to Mountain Pose and bring your hands to your heart in prayer position.

4. Tree Pose (Vrksasana)

The grounding essence of standing asanas foster feelings of confidence and strength. This particular asana relies on balance, stability, and firmness while encouraging a confident demeanor. Begin in Mountain Pose (Tadasana), another simple yet empowering asana and as you inhale, reach your arms above your head with your palms touching each other. At the same time, ground your left foot and slowly lift your right foot so that it is hugging your left ankle. As you find your center of gravity, steadily slide your right foot up your left leg until it reaches your shin or the side of your knee. As you exhale, focus on your balance and imagine your body grounded into the mat like a tree deeply rooted in the soil. Stand tall and proud in this asana as you embrace your inner and outer strength. Hold this asana for several breaths and return to Mountain Pose.


5. Chair Pose (Utkatasana)


This asana is often called the “seat of power”, “fierce pose” or “lightning bolt pose” which all embody the asana’s empowering and strengthening properties. Chair Pose involves strength and perseverance because your body will immediately feel challenged when entering this asana. Begin in Mountain Pose (Tadasana) with your feet hip-width apart. As you inhale, reach your arms up towards the sky while slowly bending your knees and squatting down as if you are sitting in a chair. Press firmly through your heels and try to bring your focus to how your body is feeling; if your thighs are aching, try to meditate on this sensation. Find your balance here and remember not to resist this asana even if your body wants to ease out of it right away. After several breaths, return to Mountain Pose and bring your focus back to your breath. If you wish, reach your toes with your arms and twist from side to side in a Forward Fold to relax your arms and stretch your hamstrings. Persisting through Chair Pose provides all of the physical benefits of this asana such as strengthening the legs and back, stretching the chest and shoulders as well as a stronger sense of self and confidence.

These empowering asanas incorporate strength, balance, and confidence to eliminate feelings of self-doubt and promote a sense of self-worth. Everyone experiences moments of uncertainty however, your yoga practice can be a powerful tool in changing the way you see yourself and accumulating inner strength. Next time you feel overwhelmed, grant yourself permission to take time out of your day and find your inner strength on the mat.

Stella Versteeg was exposed to yoga early in life from her father – traveling to India to practice yoga with her family. Living in ashrams and being surrounded by the beautiful and intricate Indian culture, from a young age, Stella was able appreciate and learn about the origin of yoga as well as meditation. Stella received her 200 HR yoga training from YogaRenew in 2018. She currently runs a blog, Ride Your Wave Yoga, which shares yoga tips, poses, nutrition, travel and mindfulness. Her goal is to spread honesty, love and awareness about a yogic lifestyle through her blog posts as well as create a supportive, inspired community. She aspires to share as much information as possible about the wonderful lifestyle that yoga has to offer and continuously evolve in her personal own practice.

7 Yoga Poses For Letting Go

By Yoga, Yoga PosesNo Comments


In order to evolve as humans, we must be able to let things go. Whether you are dealing with stress, anger, sadness or any other kind of distress, now is the time to relieve yourself of those negative emotions that are weighing you down. Holding grudges and accumulating feelings of resentment stunts your spiritual growth and ends up being detrimental to your well-being and your practice.

A new year is coming and there is no room to dwell in the past because there is so much pure and positive energy that you can open your heart and soul to. Let’s take a moment and honor change, regrowth, and the present moment. Yoga is a wonderful way to shift your focus from anything painful that might be occupying your mind to something free and wholesome. The yoga poses below can be practiced in order to form a sequence or individually if you need a moment to recollect your thoughts and take a deep breath to release any lingering bitterness.


1. Child’s Pose (Balasana)

The word “balasana” comes from the Sanskrit words “bala” which means child and “asana” which means pose. This beautiful and humbling asana is often practiced at the beginning and end of sequences. Child’s Pose is also a wonderful way to rest between challenging asanas and the benefits are numerous. Practice this asana to relax your muscles, stretch your hips, ankles and thighs, release tension in your back and shoulders as well as reduce stress and anxiety. Begin in tabletop position with your wrists stacked under your shoulders and your knees stacked under your hips. Gently shift your weight to your hips and sit back onto your heels trying to bring your big toes to touch each other. Take a deep breath and lower your torso towards the mat extending your arms in front of you or letting them rest by your sides reaching for your heels. Bring your forehead to the mat and with every deep exhale, reach even further with your finger tips if they are extended in front of you and ground yourself through your sit bones. This resting asana is a gentle and humbling act of surrender. Everything will flow in the way it’s supposed to so take a deep breath and let go.

2. Extended Puppy Pose (Uttana Shishosana)

This chest-opening and soothing asana is perfect for releasing built-up tension in your shoulders and neck as well as stretching your spine, back and shoulders. Begin in tabletop position yet again, with your wrists stacked under your shoulders and your knees stacked under your hips. Slowly walk your fingertips in front of you as your torso drops closer towards the mat and shift your upper weight onto your forearms releasing your forehead on the mat. With every deep exhale, visualize and feel your chest sinking closerand closer to the mat. Your back should be straight and your glutes lifted towards the sky while your upper body melts into the mat (there’s a reason why this pose is also referred to as Melting Heart Pose). Make sure that your knees are hip distance apart and your arms are extended and engaged. Spread your fingers to improve your balance in this pose and continue breathing deeply and slowly for 1 minute or as long as you feel will benefit you. This asana will genuinely calm your mind and allow you to immerse yourself in the present moment while focusing on your breathing.

3. Thread the Needle Pose (Parsva Balasana)


Before exiting Puppy Pose, let’s transition to this next asana which will stretch your shoulders, arms, chest and back while releasing tension between your shoulder blades. This asana can be a bit tricky to get into so let’s begin in Puppy Pose. Take a deep inhale and shift your weight to your left arm while gently lifting your right arm off the mat and reaching towards the sky. Exhale and “thread” or slide your right arm underneath your left arm with your palm facing up and rest your cheek on the mat while bringing your gaze to your right hand. Hold this posture for anywhere from 15-30 seconds while maintaining deep and
steady breathing. Once you are ready to switch to the other side, slowly retract your arm from underneath your torso and bring it back in front of you returning to Puppy Pose; repeat on the other side. Once you are ready to complete exit Puppy Pose, slowly walk your hands back up towards you and lift your hips into tabletop position. This is one of my favorite yoga poses to practice when I need to unwind because it releases tension and stress in my shoulders while offering a gentle twist to my spine.

4. Pigeon Pose (Kapotasana)

This asana is a perfect way to release stiffness and tension, especially in your hips. This effective hip-opener will allow your hip flexors to lengthen while preparing your body for seated poses and more advanced poses such as backbends. One common reason for tension in your hips is stress and frequent sitting along with a lack of movement and deep sstretching. Muscular tension as well as emotional tension are often trapped in this part of the body. Pigeon Pose is meant to stretch your hip rotators allowing that built-up to be released while giving you the chance to confront your upsetting emotions and finally set them free. Begin in tabletop position yet again with the correct alignment and slowly bring your right knee forward close to your right hand. Straighten your left leg allowing it to rest on the mat and shift your weight onto your right thigh bringing your forehead to the mat. Allow your arms to extend in front of you while you sink deeper and deeper into this asana with every deep exhale. When you are ready, return to tabletop position and repeat this pose on the opposite side. Embrace the feeling of release; let go of each negative emotion as it surfaces.

5. Cat-Cow Pose (Marjariasana-Bitilasana)


These two asanas go hand in hand; Cat Pose is excellent for stretching your spine and shoulders as well as strengthening your core while Cow Pose deeply stretches your shoulders, lower back, chest and spine while strengthening your spine and core. Begin in tabletop position with your wrists stacked under your shoulders and your knees stacked under your hips and as you take a deep inhale, arch your spine allowing your belly to drop towards the mat and bring your gaze forward in Cow Pose. As you exhale, round your spine pulling your belly into your spine and bring your gaze down towards the mat in Cat Pose. Alternate between the two asanas controlling your breathing, inhaling and exhaling deeply and with intention. With every inhale, think of anything that might be emotionally weighing you down or holding you back, collecting every bit of negativity into that breath. Now, exhale releasing all of that energy and allowing it to escape your being since it no longer has a purpose in your life. Allow yourself to entirely let go.

6. Easy Pose/Pranayama

Sometimes, this simple asana is all you need. Easy Pose is the perfect position to meditate in as it lengthens your spine and allows energy to flow through your body freely. It also provides various benefits such as strengthening the back and stretching the ankles, knees, and thighs and improving posture. Begin in seated position with your sit bones grounded into the mat. Visualize roots attached to your hips running deep into the earth like a tree and with every breath, sense yourself feeling more and more grounded. Try to keep your spine as straight as possible and cross your legs tucking your feet underneath your knees. Gently place your hands in your lap or on your knees and close your eyes, bringing your entire focus to your breath. Nothing else matters except this present moment, right here, right now. Let go of any doubts or reservations as everything in this beautiful cosmos has a purpose.

7. Corpse Pose (Savasana)

This deeply relaxing asana provides a multitude of benefits: it calms your nervous system with energizing your mind and soothing your body. Savasana is often practiced at the end of a yoga practice because it allows your body to rest and immerse itself in the benefits of that practice. To enter this pose, begin by laying on your mat with your legs extended in front of you and bring your arms to your sides with your palms facing up. Feel yourself surrendering and letting go of all that tension that no longer serves you. Imagine your body sinking through your mat into the ground and to the center of this beautiful planet. Re-center and feel the benefits of all the asanas that you have previously completed and with each exhalation, feel the weight of your body sinking into the mat. Roll your shoulders back and release any tension in your face, completely letting go of any lingering feelings of stress that might be occupying you. Shift your focus to your breath as you inhale deeply and exhale any remaining negative energy that you might be experiencing. Allow the feeling of gratitude to flow through your entire body like an ocean wave, in through your head and out through your fingertips and toes. Thank yourself for taking the time today to do something for your well being and sense of peace. Stay in this asana for 5-15 minutes or as long as you need in order to feel completely relaxed while receiving all of the wonderful benefits of Savasana. Surrender to the ground underneath your mat. Let go.


My name is Stella Versteeg and my travels, diverse ethnic background, and passion to teach as well as learn have allowed me to generate a creative and expressive outlet. What I love about my blog, Ride Your Wave Yoga, is the ability to share all things from yoga, nutrition, lifestyle, meditation to travel. Thanks to YogaRenew Teacher Training, I am a certified 200HR yoga instructor and a lifelong student who loves to write and inspire while creating a community through my blog. My goal is to spread honesty, love and awareness about a yogic lifestyle through my blog posts as well as create a supportive, inspired community. Living in Los Angeles can be hectic and fast-paced but there’s nothing that yoga can’t fix. Come along and let’s ride your wave, together!

How Yoga Saved Me From Narcissistic Abuse

By Yoga, Yoga LifestyleNo Comments


How Yoga Saved Me From Narcissistic Abuse
And How It Can Help You With Anxiety/PTSD


Yoga has the power to empower and inspire people all over the world. For me, it helped save me from narcissistic abuse. When I was 14, an abuser came into my life. At that stage in life, I was a young teen. I was young and impressionable and felt like the world was against me. It was then that a 20 year old man came in like a knight in shining armor; he seemed to understand me and made me feel special.

I could write a book about the following 17 years and the hell I went through.

At a young age, he started to control and shape my very opinions. He wouldn’t allow me to make any decisions and if I tried, he’d become upset and made me feel worthless for it. As the years went on, he shaped every thought and opinion I had; including controlling relationships with my family and friends. He also kept me powerless by controlling my own money. He would guilt me into spending my money for his needs – even though he made MUCH more then I – until I didn’t have enough to make ends meet. Then he’d give me just enough to get by so that I financially relied on him. He had to know everything I did and everywhere I went. He also made it so that eventually he was all there was, all I had, and all I could trust. This man even shaped my opinion of God so that I no longer trusted in a loving higher power.

During this time in my life, I lived in a state of state of anxiety so high – wanting to please him and feel like I was enough. I struggled with agoraphobia, panic attacks, and PTSD, all the while he convinced me these things came because I was weak, not because he took away every ounce of strength I had. I survived on medications, social avoidance, and walked through life like a miserable and broken puppet on a string.

Friends, family, even therapists tried to make me see what was happening to no avail. I was brainwashed. I was held hostage in an emotional prison of his making that there was NO escape hatch from.


Many things happened at once to have finally given me the strength to break free but the one I must give the most credit to is YOGA.

I started doing Yoga through online videos. Then I made a friend at work that fueled my interest more. As I gained a sense of accomplishment through learning new physical positions – my confidence in myself began to grow. I became more involved in this gentle exercise and before I knew it, I’d began to find my own inner light. I found that for the first time in my life, I had an identity on my yoga mat that was my own. I had a self-esteem that was built from within and not dependent on this abuser’s opinion of my self-worth. I even began to rebuild my faith in a higher power.

Eventually I learned to bring what I gained on the yoga mat into my life, and I found the strength to break off my relationship with my abuser. We’d broken up many times over the years but it was always him doing the breaking up and me doing ANYTHING I could to get him back. How VERY empowering that I had the power now. He still stayed in my life as a friend, however I did my best to distance myself from him.

When I began the yoga teacher program, I didn’t tell him. I recognized his power to shape my opinion and I didn’t want to risk his influence. I wanted SO badly to prove I could do this on my own. That I could accomplish something without him. And I did!

It was shortly after I gained my yoga teacher certification that he left again. This time however, due to the inner strength I’d cultivated through my yoga practice and new found self worth nurtured from my time on my yoga mat, I was no longer dependent on him. When he disappeared from my life this time as a “punishment,” refered to as ghosting — I happily let him go and in my now open heart wished him well.

I still find insecurities and anxieties from the years of gaslighting from a narcissistic abuser — but I now know I have the space and ability to work through them and most importantly; to heal. What’s more, I have the ability to share them with you now.

How To Use Yoga To Work Through Anxiety & PTSD

Mental health struggles such as anxiety and PTSD rob us of our sense of safety and identity. By regular practice on our mats we can create a safe space to let go and just be. As cliche as “let go” and “just be” have become, they are truly the foundation I’ve built on for finding myself again.

A Meditation for Self Acceptance

Find a comfortable position on your mat in Easy pose or Savasana with your spine straight. Take some long and deep cleansing breathes in and out. Allow yourself to focus the sensation of the air going in and out of your lungs.

On your third inhale, hold the breath — and in pause between inhaling and exhaling allow yourself to fully release all false beliefs, fears, and insecurities you’re holding onto. As you exhale, feel all those negative energies leaving your body through your breath.

On your next inhale, feel how much lighter your energy feels. Repeat this, and continue using the pause on every third breath to release things that no longer serve your higher good. Do this for as long as you need. On your last exhale, smile knowing you are free from all things that are not true to your happiness.

It’s ok if this exercise makes you emotional. If you feel angry, sad, feel the need to cry, or scream – accept it and allow these emotions to be there. Acknowledge your feelings and let them go. This powerful practice allows your feelings to be validated, while reminding yourself that they do not need to be held onto.

Remind yourself that It’s OK to feel however you feel. Repeat to yourself the following mantra, “I am enough, just as I am.”

You may not always like who you are each day, but that’s OK! Accept yourself AS YOU ARE and know that where you are, is where you need to be on your journey to a better you.

Yoga Poses For Inner Strength

1. Warrior 1 & 2

Virabhadrasana or Warrior pose on the physical level teaches us to open ourselves up to the unknown. It also teaches us to improve our balance and to strengthen our foundation by building strength in our feet, hamstrings, glutes and core. These lessons are mirrored internally as we sink into the pose and allow the Warrior inside of us to come forth. This pose also helps us find the balance between yin and yang or strength and vulnerability. It also fuels us with an inner confidence we can lead our lives from.


2. Camel Pose

In Ustrasana or Camel pose, we allow ourselves to open up our chakra or energy centers to clear away blockages especially in the heart center and solar plexus. It is in these two chakras where we house our love and our personal power. In this pose, we are vulnerable but not unprotected. Camel pose reminds us that we can have an open and inviting heart, while still being able to function within our own power and set safe personal boundaries.


3. Tree pose

In Vrksasana or Tree pose we learn to be honest with ourselves to find our own personal balance required to hold ourselves upright in this challenging times in our lives. Tree pose gives us a chance to look within and accept our truth. It also encourages us to act from that place of truth we discover from within ourselves. When we can learn to honor ourselves in this way – no one can dishonor you.


Above all else, be patient and kind with yourself. Some days will be harder then others. Some days will be easier. You didn’t get to today by being weak or giving up, you got here because you are strong, and beautiful, and SO very worth all of your efforts.

Love and Light,
Corbi

I’m Corbi Hickman, a 33 year old psychiatric RN, mother to a beautiful 7 year old daughter, Reiki practitioner and recent graduate of the 200 HR YogaRenew Teacher Training program. I’ve recently started my own freelance Yoga and Reiki Business called White Phoenix Yoga and Reiki which you can find on Facebook and will be launching my own blog soon (stay tuned!) I’ve had so many ups and down in my life and am blessed with a family and an inner strength that has helped see me through it all to brighter days. My HOPE is to show others that they too can rise from the ashes of whatever they’ve been through and come out the better for it.

Namaste

5 Ways To Cultivate Self Love Through Yoga

By Yoga, Yoga Lifestyle, Yoga PracticeNo Comments


“You yourself, as much as anybody in the entire universe, deserve your love and affection” – Buddha

With the celebration of Valentine’s Day this week, we often correlate Valentine’s Day with love for others. While our relationships with others is an important aspect of love – the most essential type of love is often overlooked — self love. I’ve created this guide to help you get in touch with and cultivate the most important relationship you will ever have – with yourself.

Yoga practice is an excellent way to reconnect with ourselves and boost our self worth. Yoga allows us the time to just be ourselves and be fully present in our bodies with no judgments. It gives us the time to be still and care for ourselves deeply – in mind, body, and soul.

Self love is about taking the time to celebrate and love yourself fully. It’s about removing negative self talk and reminding yourself just how truly awesome you are. Self love is about taking time to care for yourself and recharging when you need it. It’s also about reminding yourself that when you do love you more fully – you not only fill yourself up with more love — but that love begins to spill over and radiate out into the world.

Here are 5 simple ways that you can start cultivating self love today.

1. Take Time To Celebrate Yourself

Cultivating self love allows us to let go of our negative self talk. It gives us the opportunity to reframe and see ourselves in a more positive light. We tend to focus on the things we do wrong or our regrets instead of focusing on our accomplishments and successes.

Practice acknowledging all the amazing things you do or wonderful things that you love about yourself. You could do this by writing down a list of things you love about you in a journal. These things could be physical things, accomplishments, or traits you love about yourself. Look at your list often and take time to meditate on it frequently.

Here’s a great ‘celebrating you’ meditation you can do easily anywhere:

Celebrate Yourself Meditation: Begin lying down or sitting in a comfortable position. Bring your attention to your natural breathing cycle for about a minute; just simply observing it – not trying to change it in any way. Next, bring to mind 15-20 things you love about yourself. As you bring these things to mind, imagine feeling that love and appreciation in your heart for yourself radiating outwards into the world. Stay in this meditation for as long as you’d like.

2. Give Yourself ‘Me Time’

Many of us live busy lives in which we have numerous responsibilities to others; this includes our relationships to our loved ones, children, or our jobs. We sometimes focus so much on giving to others that we forget to give to ourselves – making us feel drained. Remind yourself the more you fill up your own cup with self love, the more love you’ll have to give to others.

Here are some ideas for your next ‘me time’:

• Meditate daily

• Practice pranayama or deep breathing exercises

• Cook and eat a lovely meal for yourself

• Take yourself out on a date

• Go for a relaxing walk

• Listen to soothing music

• Exercise

• Buy yourself flowers

• Book a massage or spa appointment

• Enjoy a nice warm cup of tea or coffee

• Read a book

• Write in a journal

• Take a long relaxing bath

• Enjoy a glass of nice wine


3. Practice Self Love Affirmations

Practice saying positive things about yourself through daily affirmations. Affirmations are a powerful practice that can change your belief systems on a deep subconscious level. Write down a few of your favorite affirmations on a sticky note and put them in places where you’ll be reminded daily. You can even make a reminder on your phone and affirm these to yourself several times a day. You could also set aside 5-15 minutes to sit in stillness and repeat the affirmations in meditation.

Here are some affirmations you can use to boost your self love:

• “I am more than enough”
• “I love myself fully and completely”
• “I accept myself as I am”
• “I love myself unconditionally”
• “I love my body and all that it does for me”
• “I am worthy of all the love, joy, and abundance in the world”
• “The only approval I need for myself is my own”
• “I release any negative judgments I have about myself”
• “I love the woman or man that I am”
• “I am strong, powerful, and full of radiant energy”

4. Set Healthy Boundaries For Yourself

Self love means setting healthy boundaries for your and knowing what your core values are. Remind yourself that you don’t need anyone else’s approval but your own to live your best true life.

Setting boundaries sometimes means letting go of negative situations or people in our lives. Meditation helps us to be more aware of our emotions and things in our lives. Take time to sit in stillness and allow your inner wisdom to guide you. If something is draining you or taking away your joy, have the courage to remove it from your life.

5. Yoga Sequence For Self Love

Practicing self love is a very soothing practice that requires surrender and peace. It’s also an empowering act that gives us strength and courage. To sequence yoga poses for self love, consider calming yoga poses combined with power poses.

Here we’ve created a mini self love sequence you can do at home easily:

Child


Delve into self acceptance and self love through the surrender of Child pose. As you hold this pose for up to a minute or longer, repeat the following mantra to yourself; “I am enough.”

To do this pose, begin on your hands and knees. Sink your hips back towards your heels and reach your arms forward. Relax your belly onto your thighs and rest your head towards the mat. Keep length in your spine and relax your neck. Hold and breathe, feeling yourself sink deeper towards the earth with every exhale.

Goddess


Get in touch with your inner Goddess or God with Goddess Pose. This power pose helps to elicits a feeling of strength and confidence. As you hold this pose using your breath, repeat the following mantra’ “I am strong and worthy”.

To come into Goddess, from Mountain pose, step your feet wide a few feet apart, turning the toes out slightly towards the outer edges of the mat to about 45 degrees. Bend your knees and come into a wide squat, working to get the your thighs parallel to the mat. Keep your knees pointed in the same direction as your toes. Hold for several breaths.


Warrior 2


Discover strength and inner peace with Warrior 2. As you hold this pose, repeat the following mantra to yourself; “I am worthy of all the love and joy in the world”.

To come into Warrior 2 from Mountain pose, step your feet apart 3 and a half to 5 feet apart. Point your front toes 90-degrees toward the front short edge of your mat and your back foot slightly in about 45-degrees. Lift your arms up bringing them parallel to your mat and bend your front knee stacking it over your ankle or slightly behind it. Hold for several breaths and switch sides.

Pigeon


Pigeon pose is a deep hip opener that creates a deep sense of surrender in the body. It also helps calm the mind and soothe the soul. As you hold this pose for up to a minute or longer on each side, say to yourself with every exhale, “I accept myself fully as I am”.

To do Pigeon pose, from a tabletop position, bring your right foot in and place it down on your mat behind your right wrist. Adjust your shin so that it’s comfortable for you. Extend your left leg back on the mat. Come up onto your fingertips and walk your torso slightly up with the chest lifting and broadening. Stay here or to deepen the pose, begin to fold towards the mat keeping your spine lengthened. You can choose to come onto your forearms or rest your head on top of a block. To further deepen, you can bring your forehead down towards the mat and extend your arms out in front of you – with your palms facing down.

Savasana

Savasana is the ultimate relaxation pose in yoga. Use this time to cultivate self care and love for yourself; staying here for up to 20 minutes or longer. You could enhance your Savasana practice by dimming the lights, lighting candles, and playing soft ambient music. You can even use aromatherapy to further induce inner peace; Rose, Jasmine, Bergamot, and Sandalwood are great essential oils to use for self love care.

To do Savasana, come down onto your back and relax your arms and legs out comfortably. Allow your palms to gently open up towards the sky. Close your eyes and relax the muscles in your face. Let your breath be soft and natural as you just allow yourself to release and enjoy the moment. Remind yourself that by giving yourself this time to reset, you’ll be able to give more of yourself to others. Stay here for as long as you’d like.


Yoga Poses For Better Sleep

By Yoga, Yoga PosesNo Comments


Ah, to get a restful nights sleep! For many of us, a full 8 hours of sleep is something we only dream about during whatever REM sleep we are able to get.

A good night’s sleep is incredibly important for your health. In fact, it’s just as important as eating healthy and exercising. Unfortunately, many of our daily stresses are interfering with natural sleep patterns and causing our sleep to be interrupted and shortened.

If you are looking for a holistic and natural approach to bettering the quality of your sleep, yoga postures and breathing exercises might be the solution. Also, make sure to consult your doctor if you have questions or concerns about a yoga pose or a breathing exercise. Always enter a pose slowly to ensure there is no pain or tension. If something doesn’t feel right, listen to your intuition and back out of it.


1. Cat and Cow Pose

A great set of complementary poses that will release your spine and incorporate your breath. Start on your hands and knees. Inhale into Cow pose by bringing the crown of your head and tailbone up toward the ceiling, hollowing out your lower back. For cat pose, exhale as you tilt the crown of the head and tailbone down to the ground, arching your spine into a C-curve and pulling the shoulder blades apart. Flow between these two poses as long as you’d like, moving with the pattern of your inhales and exhales and feeling like you’re putting space between every vertebrae and loosening up your spine. To slow down and control your breath, try to match the length of each inhale and exhale with the length of each pose, with a momentary pause between cycles.


2. Child’s Pose

From hands and knees, sink your hips back to your heels and settle your chest between your thighs. Your big toes should touch one another and your knees are as far apart as they need to be in order to help you settle comfortably and be able to breathe deeply. With your forehead resting on the ground or a blanket, walk your fingertips out in front of you and stretch through the arms. You can also roll your forehead from side to side on the ground to give yourself a mini face massage.

This is a great time to slow down your breathing and allow the exhales to soften your body down, releasing any tension in the shoulders and back.


3. Legs Up the Wall


Transitioning onto your back, position yourself so your tailbone (lowest part of your back) is leaning against the base of a wall, or another flat, tall surface. The headboard of your bed might even work!

Extend your legs straight up the wall. If you can, bring your tailbone closer to the base of the wall, perhaps even to the point where your glutes and upper hamstrings are touching it. This pose can be a great gentle hamstring stretch if you can keep the legs straight.

This pose helps drain lymph and lactic acid from the legs, which helps prevent injury and decrease the symptoms of fatigue and soreness if you spend a lot of time on your feet. Allow the looseness that you brought into your back with the previous postures help you feel more comfortable in this pose. Place a pillow under your head for additional support and feel free to either place your hands on your chest and belly, or stretch them out to a ‘T’ shape.

4. Supine Spinal Twist


Transitioning away from the wall, bring both knees into your chest and rock side to side or take big circles with your knees. When you’re ready, bring your arms out into a ‘T’ with your hands in line with your shoulders and let your knees fall over to one side. You can keep both knees bent, straighten the top leg, or choose to straighten both legs. If you’re not feeling as much of the twist as you’d like, try to adjust your hips further over to the middle of your space so that your back is in one straight line —this may intensify the stretch in the lower back. If you’d like a neck stretch as well, turn your head to the side opposite your knees. After a few breaths, switch sides.

When you’re ready to get in bed for the night, the right breathing exercises could be beneficial to relax your body, mind, and even help you doze off.

Pranayama For Sleep

Pranayama or breathwork is another great way to promote better z’s. Here are three simple breathwork practices you can try to help you sleep before bed.


1. Meditative Breath

For a short meditation, sit up in bed with your back straight and your head tucked slightly forward. Progressively begin to lengthen your breaths. For the first exhale, count to one. Then count to two, then three, all the way up to five. After your fifth exhale, held for a count of five, start over again at one. By keeping this pattern you allow your mind to remain focused on your breath instead of anything swirling through your mind in the evening.


2. Diaphragmatic Breath

With one hand on your lower belly and the other on your chest, take five deep breaths, inhaling for a count of three, then exhaling for a count of three. Clear your mind by focusing on the way your hands rise and fall according to your inhales and exhales.


3. Visualizing Breath

As you inhale, envision the air traveling into your nose, through your entire body, and back out again. Imagine it traveling through all your muscles, all the way to your toes and fingers, before it comes back out again during your exhale.

Focusing on your breathing activates your parasympathetic system, (also known as the rest and digest system) encouraging it to calm down, relax, and lower your heart rate in preparation for sleep.


Morgan Gertler received her 200HR RYT certification in 2014 from highly esteemed Kripalu teachers and then continued her learning in 2017 by completing her 300HR RYT certification with teachers from Yogamaya and the Iyengar Institute in NYC. Morgan also completed her Yin Level 1 & 2 trainings and loves being able to teach both sides, the yin & yang, of the yoga practice. Morgan views yoga as a vehicle to get back to yourself – through movement and breath-work, we learn how to live a more authentically happy & content life and meet all situations with confidence. When not teaching or practicing yoga, Morgan can be found writing, walking around town with her two dogs, Jagger and Bowie or browsing Sephora for more make up she doesn’t need.